JS SDK Browser Wallet Demo
Demo for Polygon ID JS SDK Browser Wallet Extension
Polygon ID has created a sample browser wallet extension based on our JS SDK that lets its user fetch credentials from an Issuer and generate proof for these credentials to be presented to a Verifier.
You need to manually install the browser wallet extension on your machine. This wallet works like a common crypto wallet such as the MetaMask Wallet but differs in functionality.
Some of the content on this page is still to be updated. Please note that the "Polygon Verify" service mentioned in the screenshots has been eliminated. The screenshots illustrate the general process of how the JS SDK wallet extension works.
Demo for JS SDK Browser Extension Wallet
Install the Polygon ID JS SDK browser wallet extension on your machine and open it.
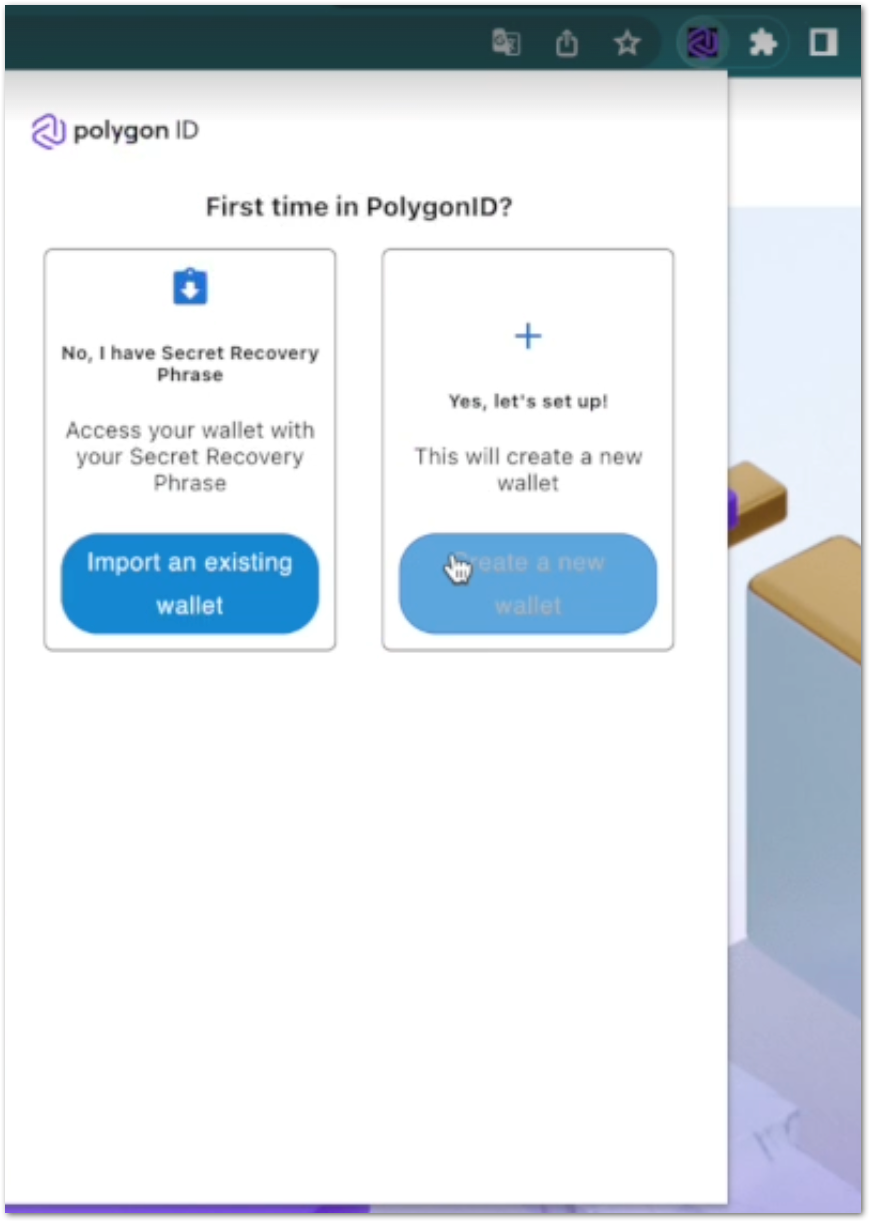
When you open the extension for the first time, it prompts you to create a new wallet or import an existing wallet. Click Create a New Wallet.
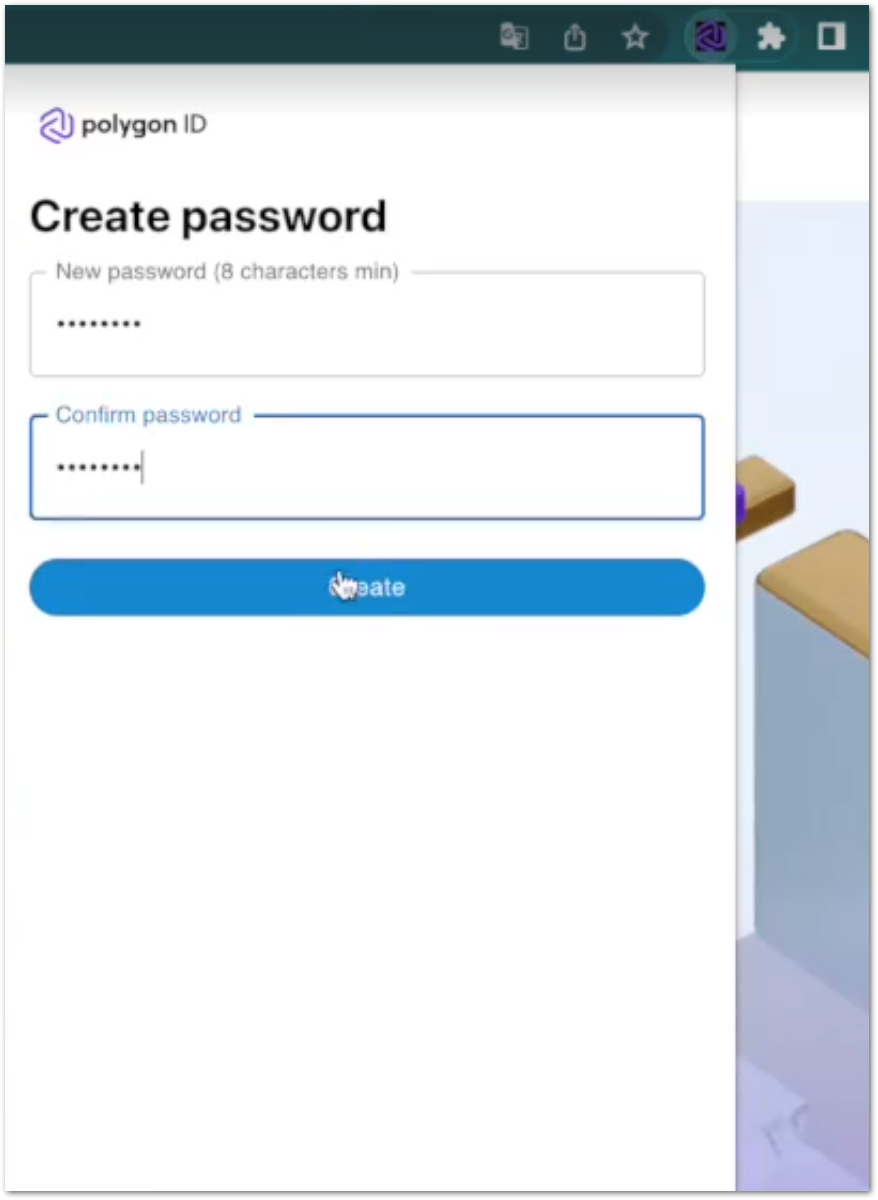
- This shows the Create Password screen. Enter your password and confirm it. Click Create.
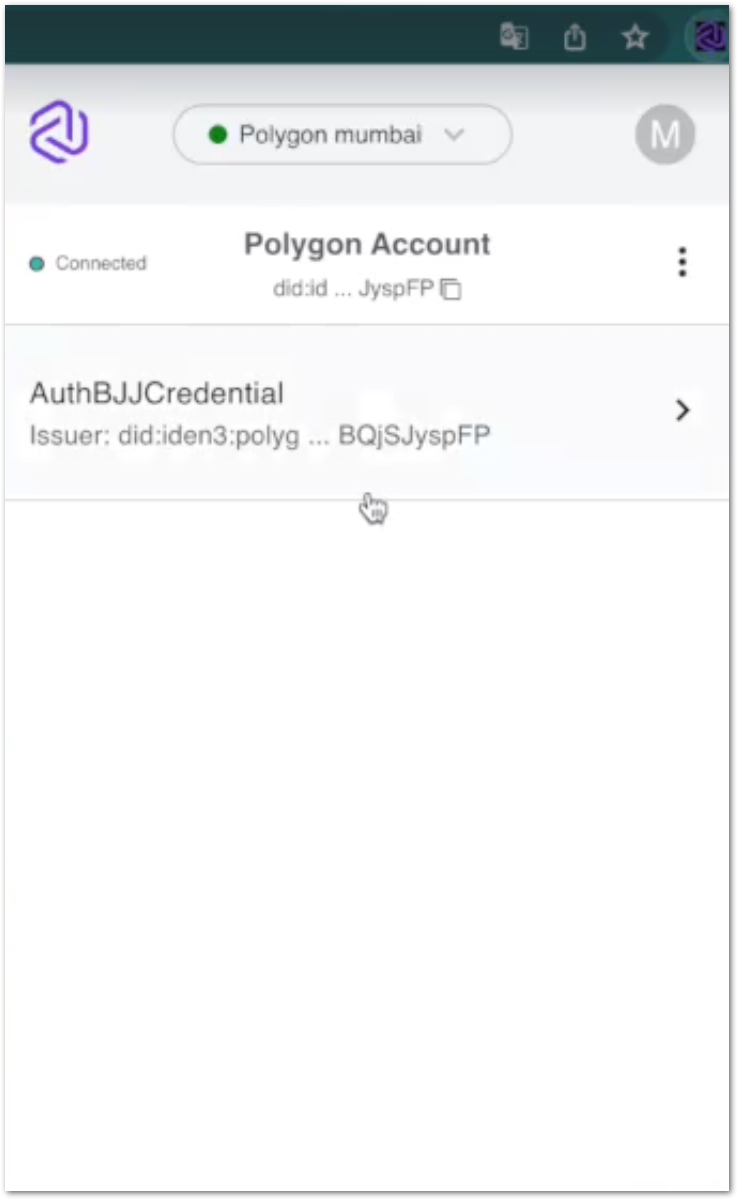
- This displays the Polygon Account window on your browser wallet.
- Open the Polygon Verify website (this is like an Issuer site that issues credentials to its users). Click Sign Up.

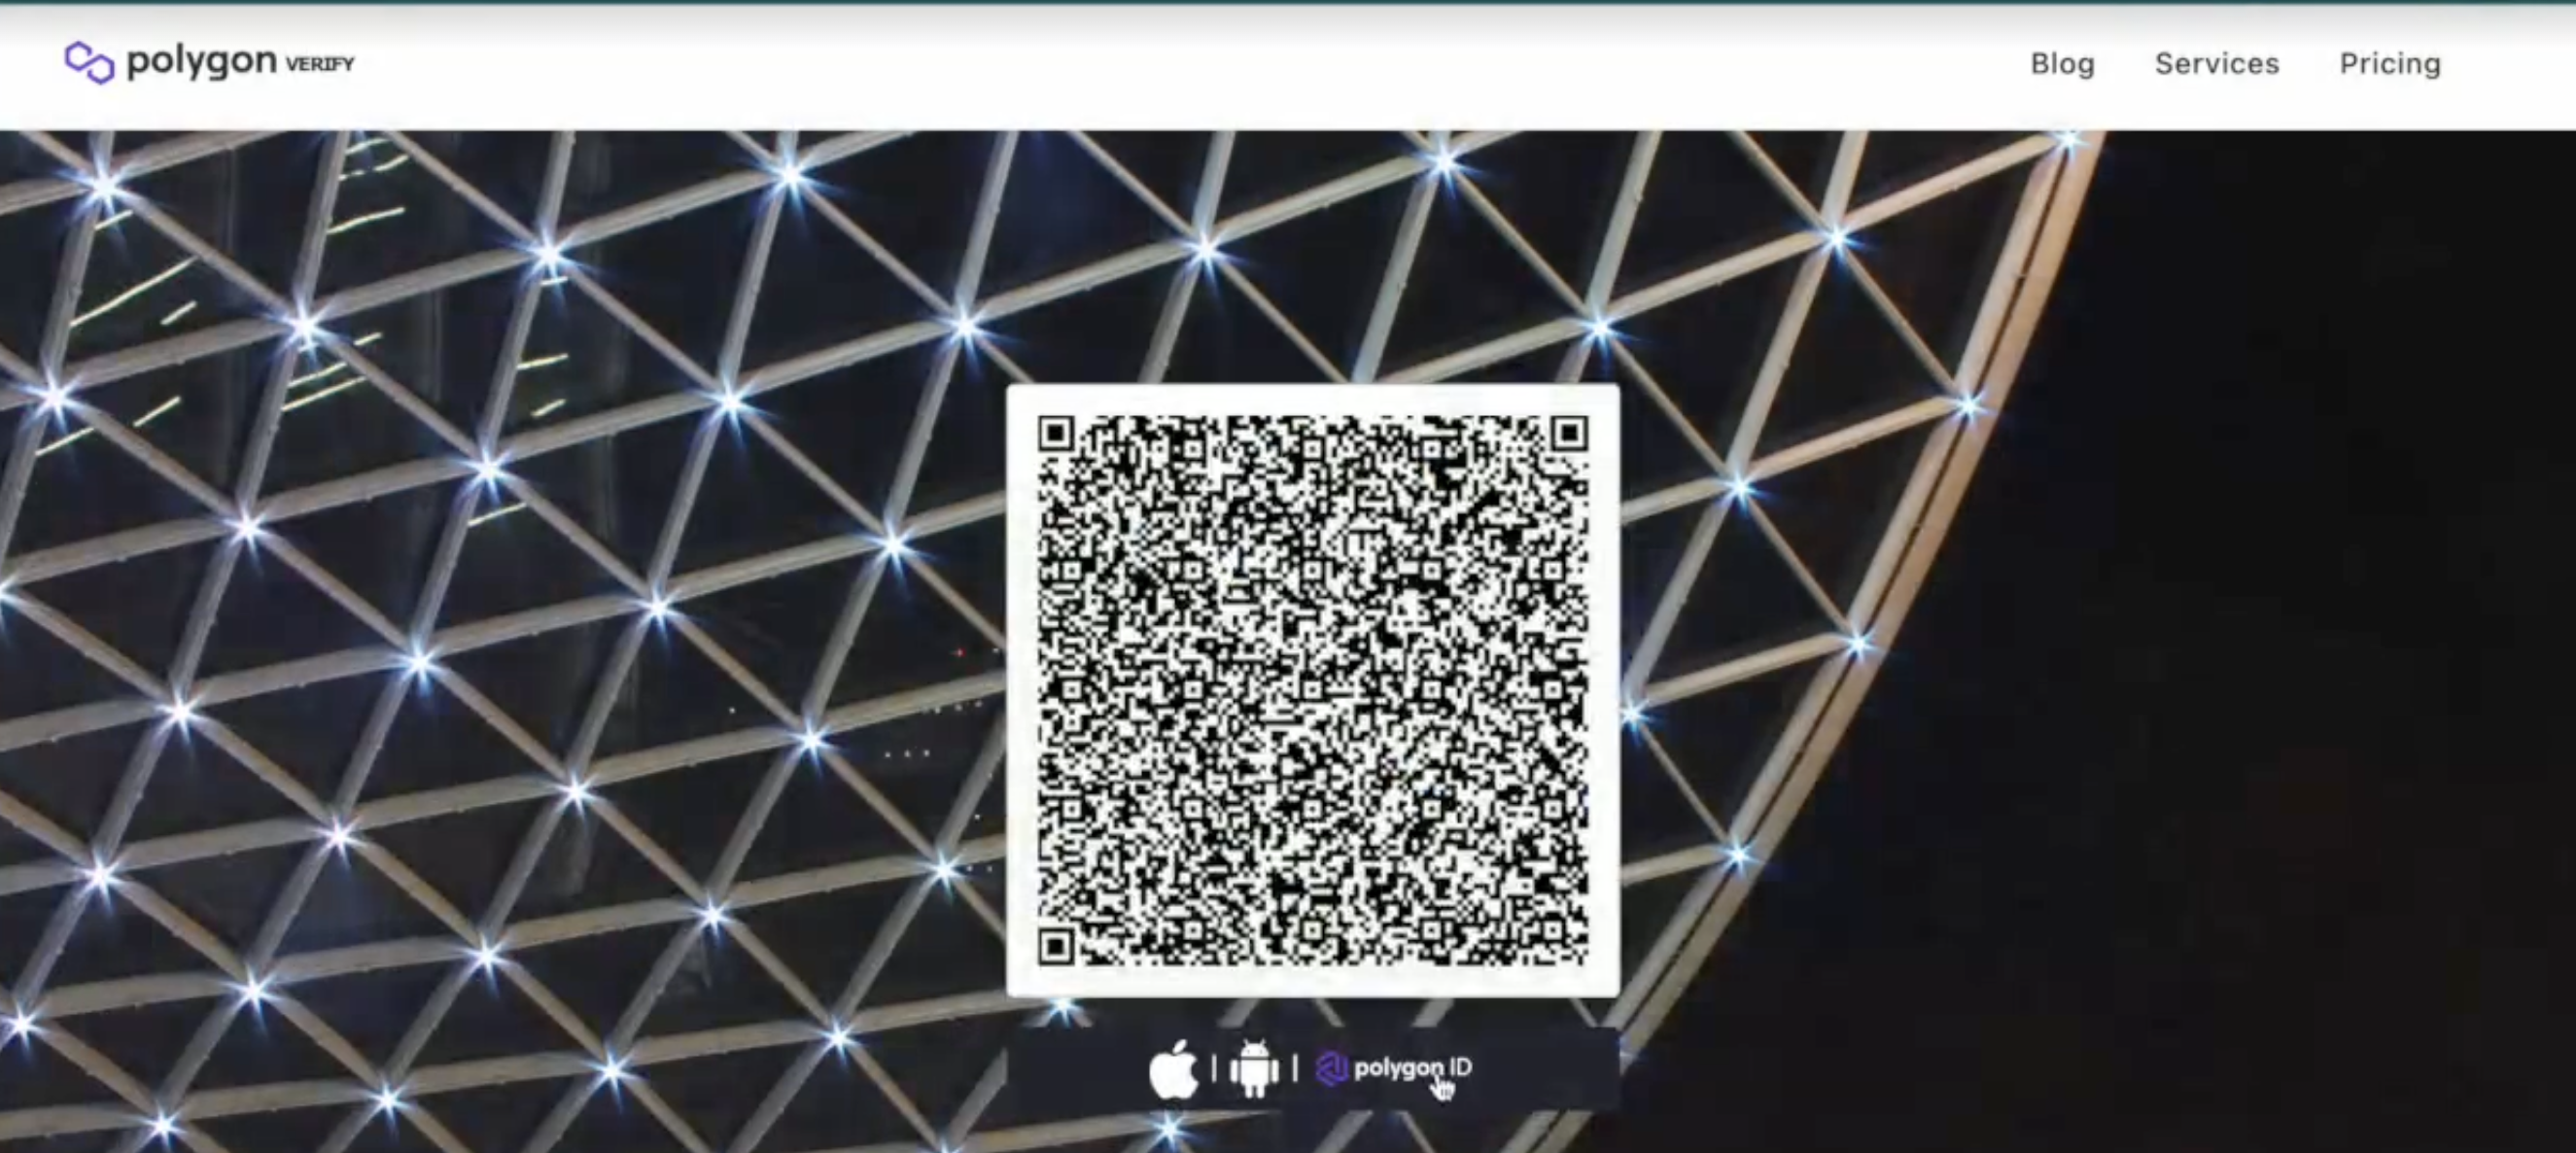
- A QR Code is displayed. Click on the Polygon ID icon to open your browser wallet.
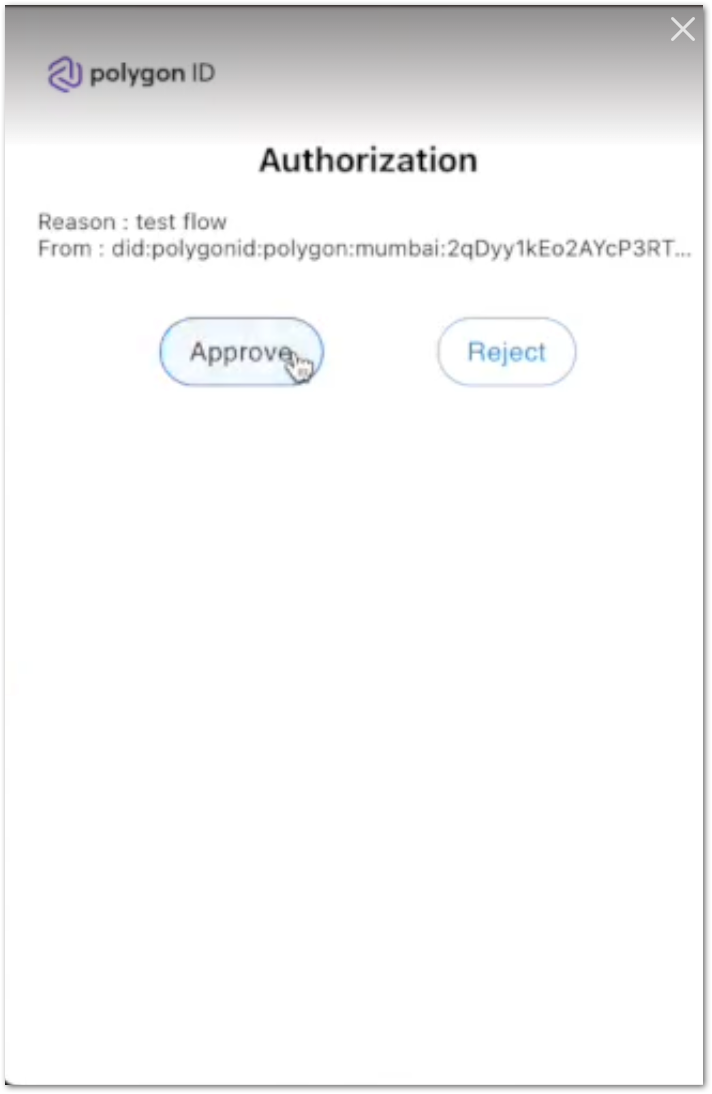
Your wallet shows the Authorization window. Click Approve.
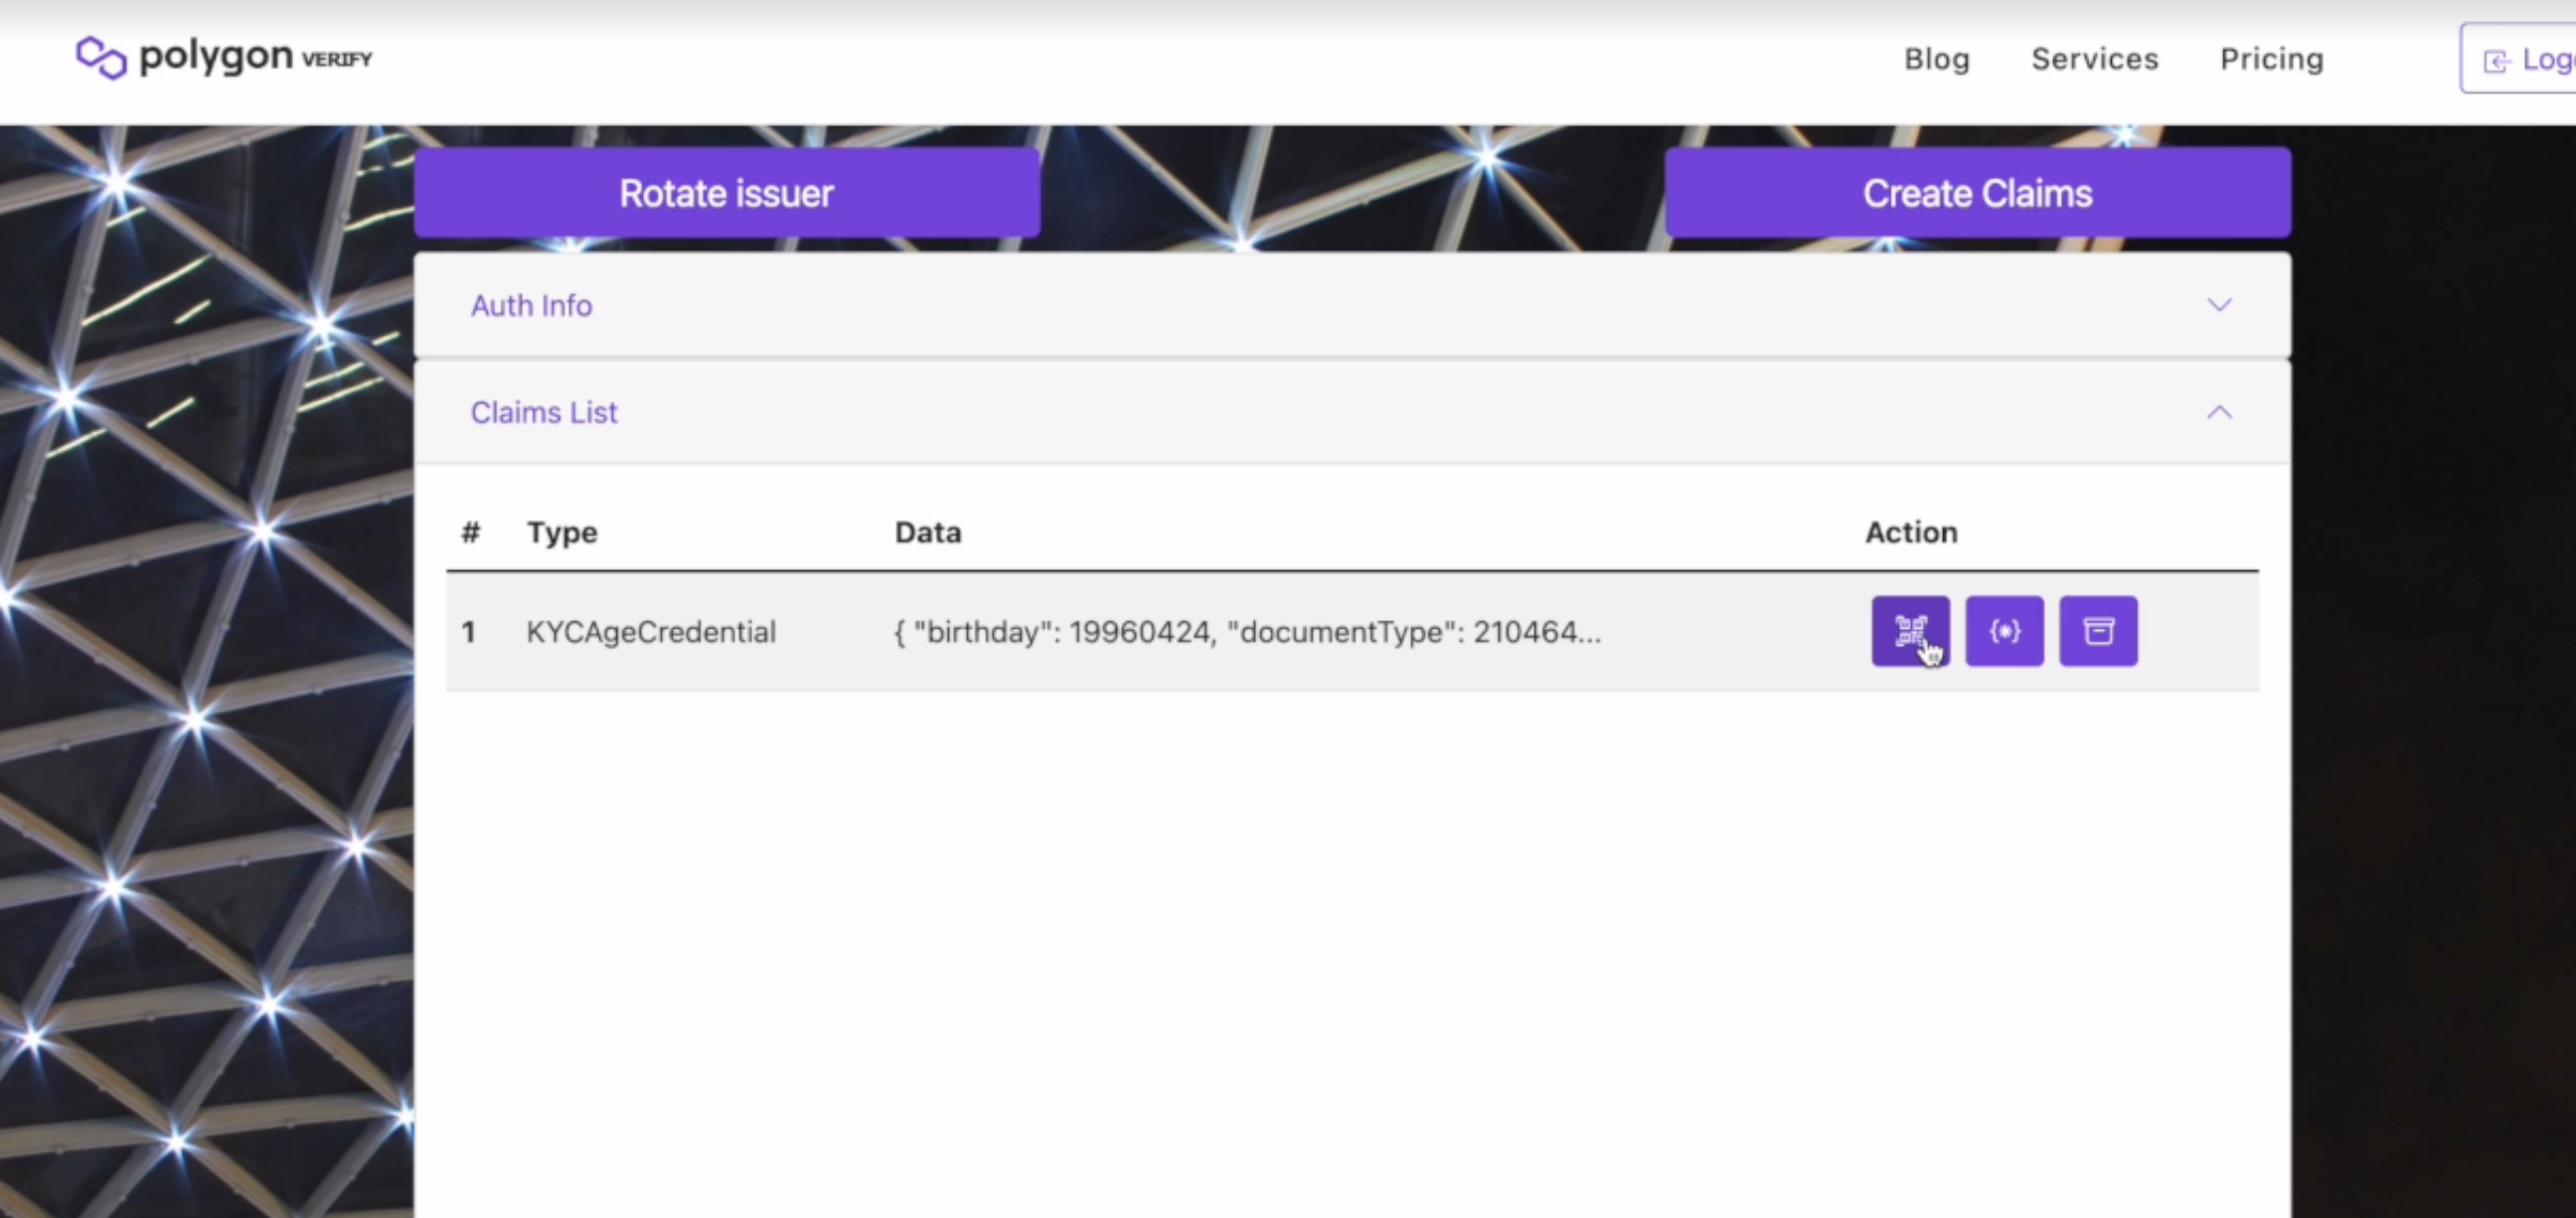
This shows auth info and claims list on the Polygon Verify site.
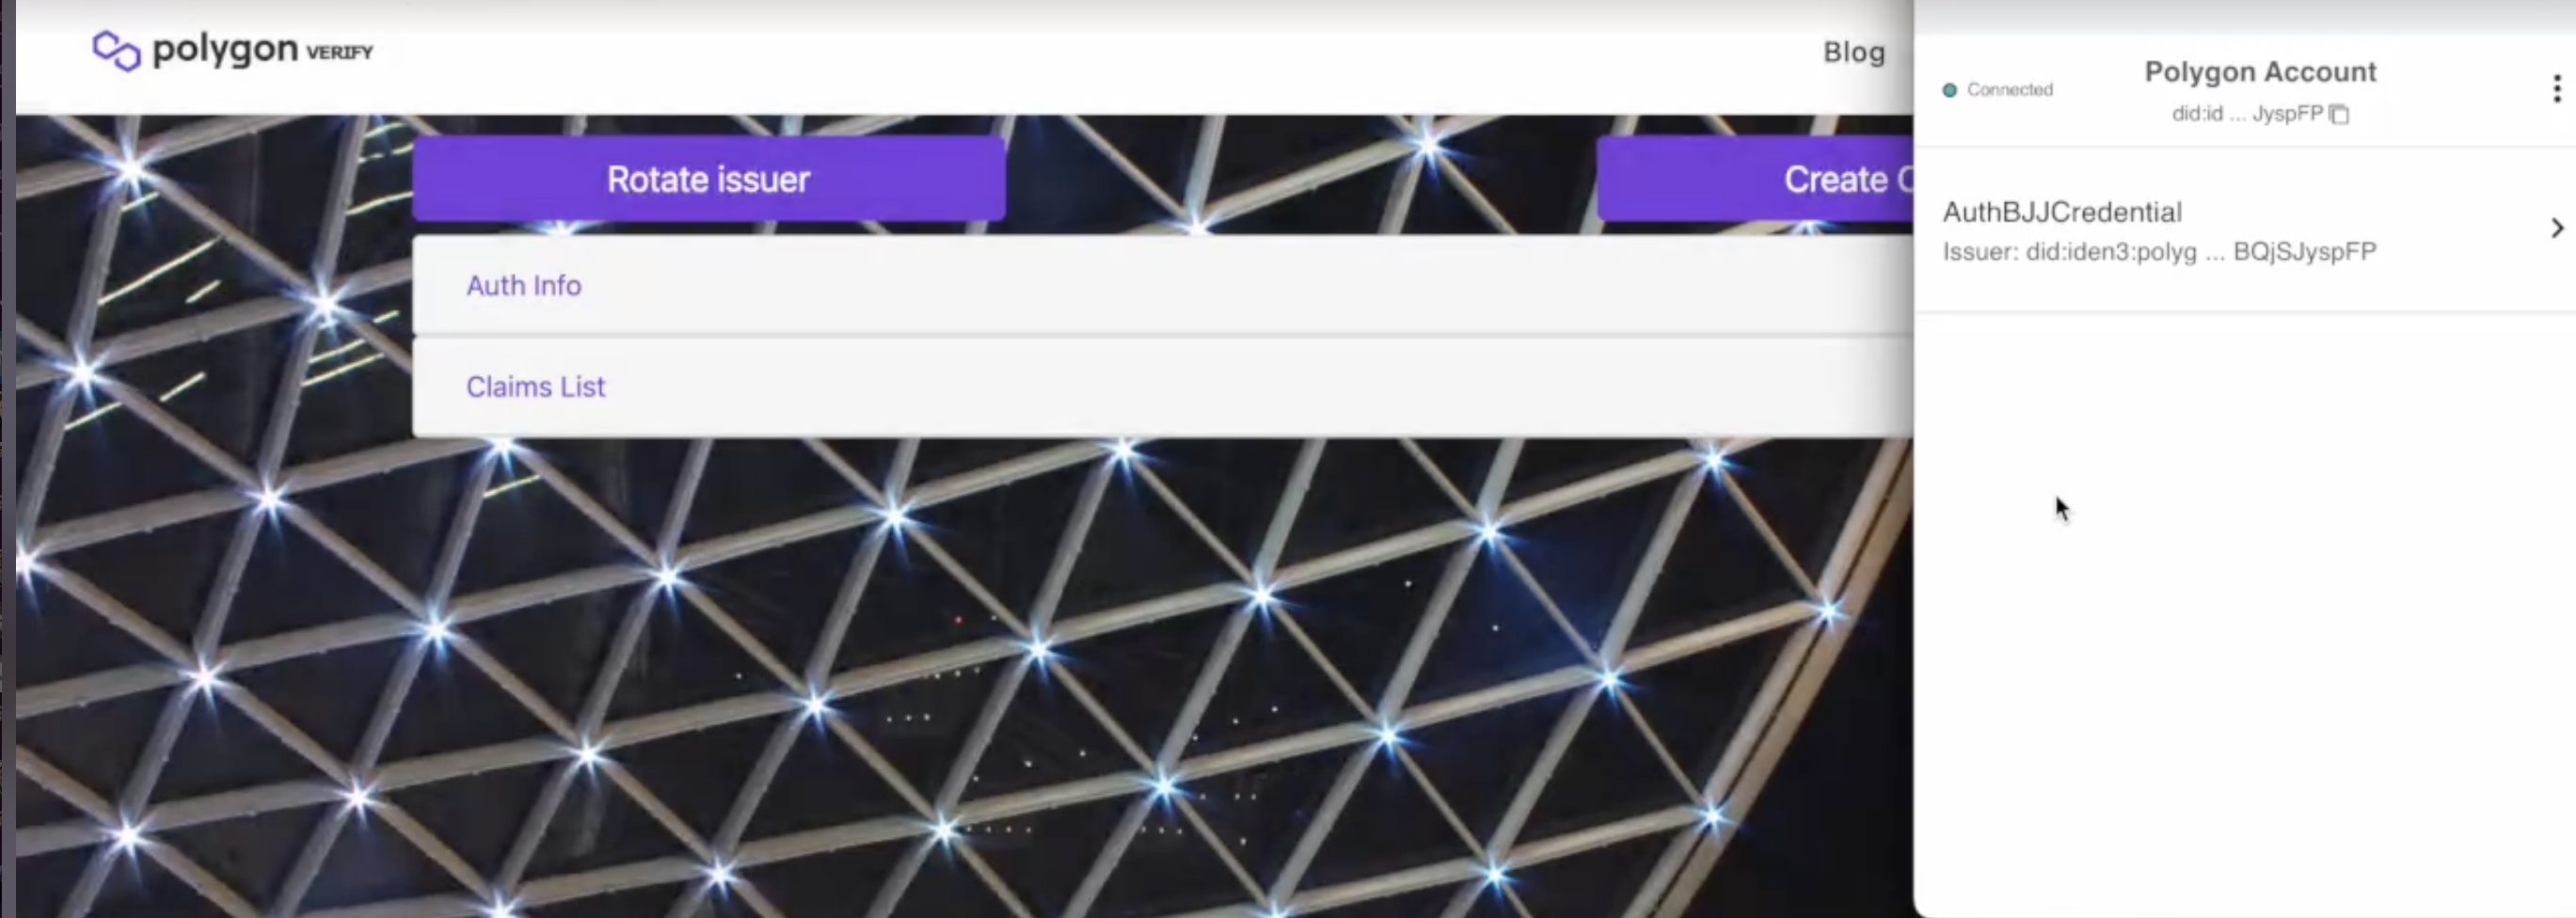
Steps to Create and Fetch Credentials
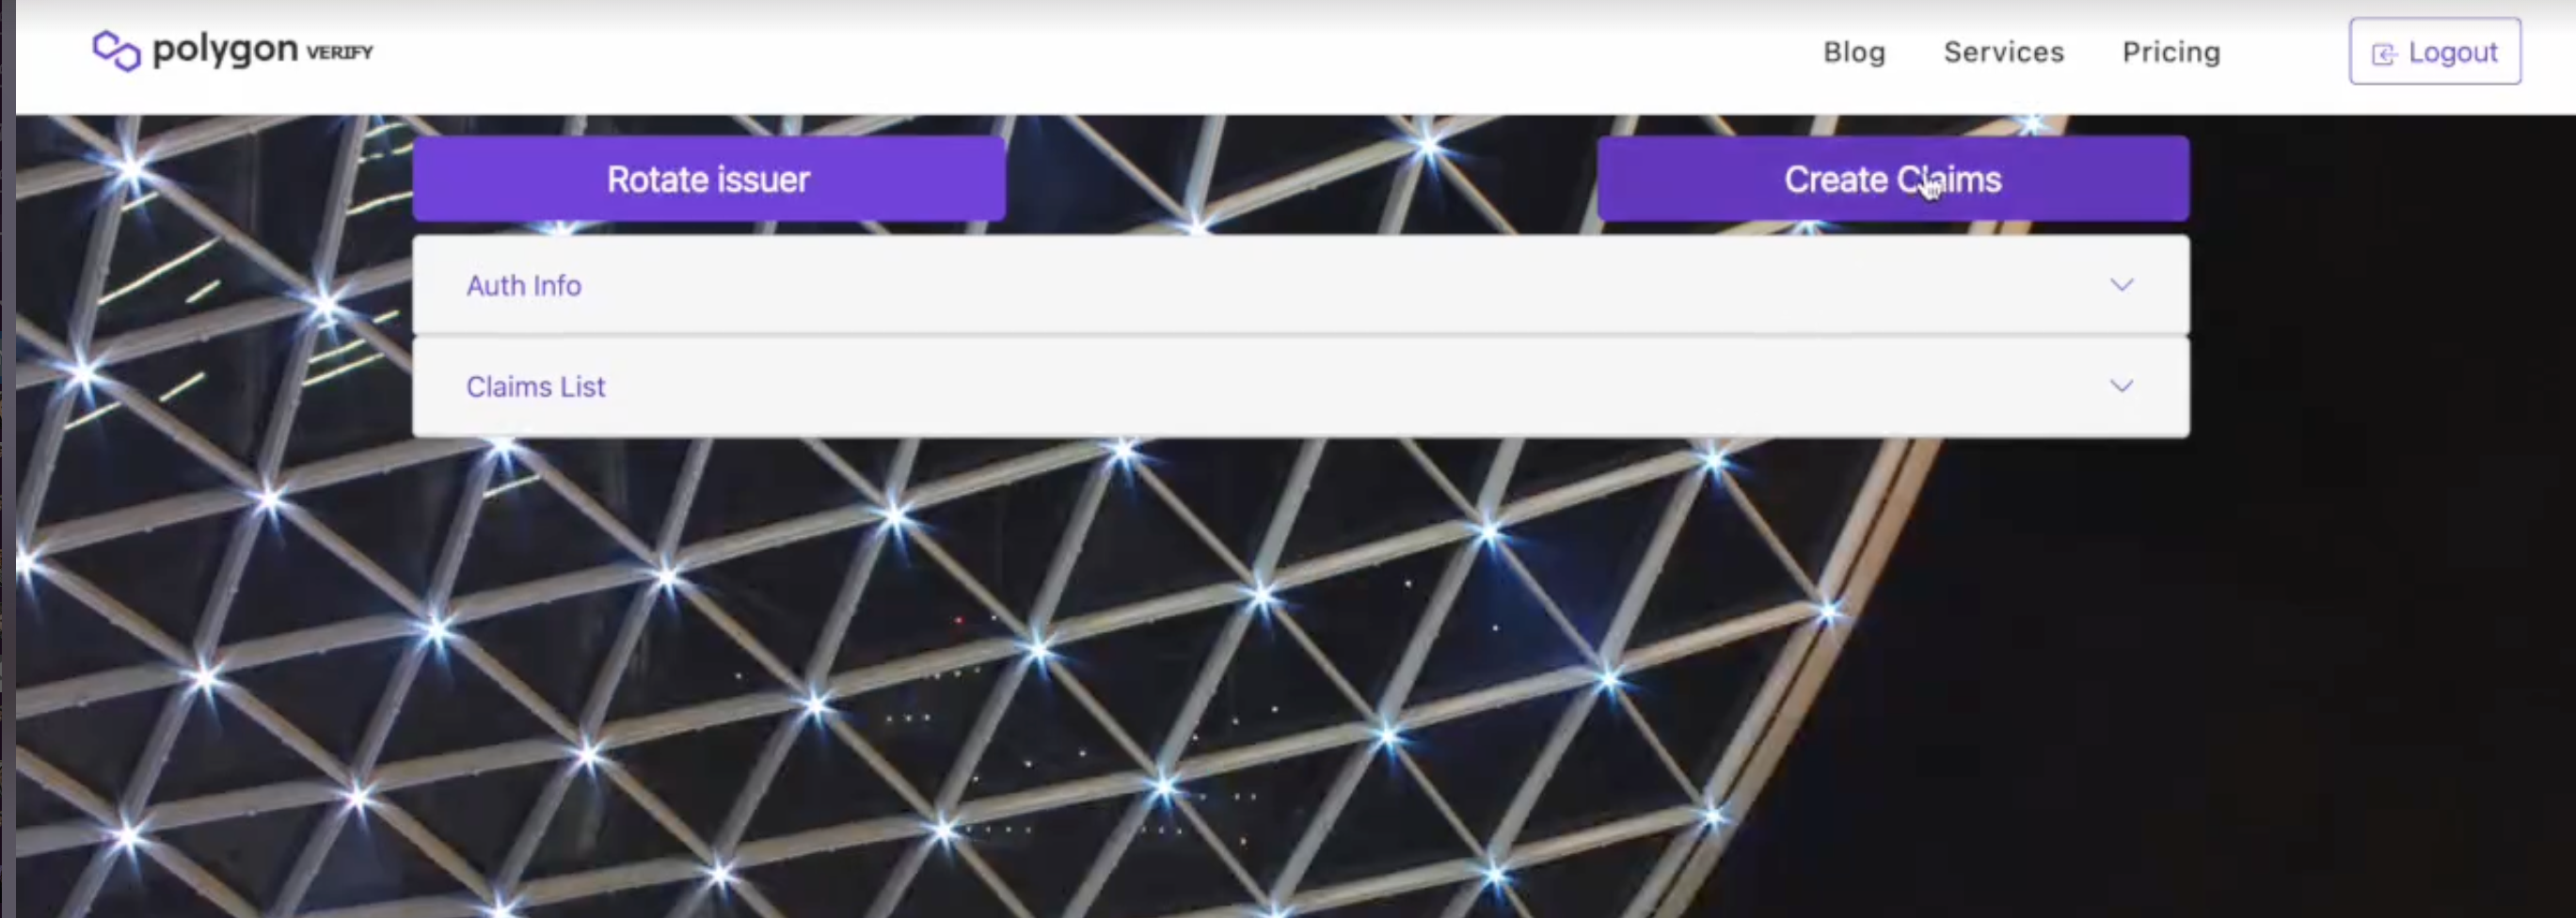
- On the website, click Create Claim.
- This displays the screen to create claims.
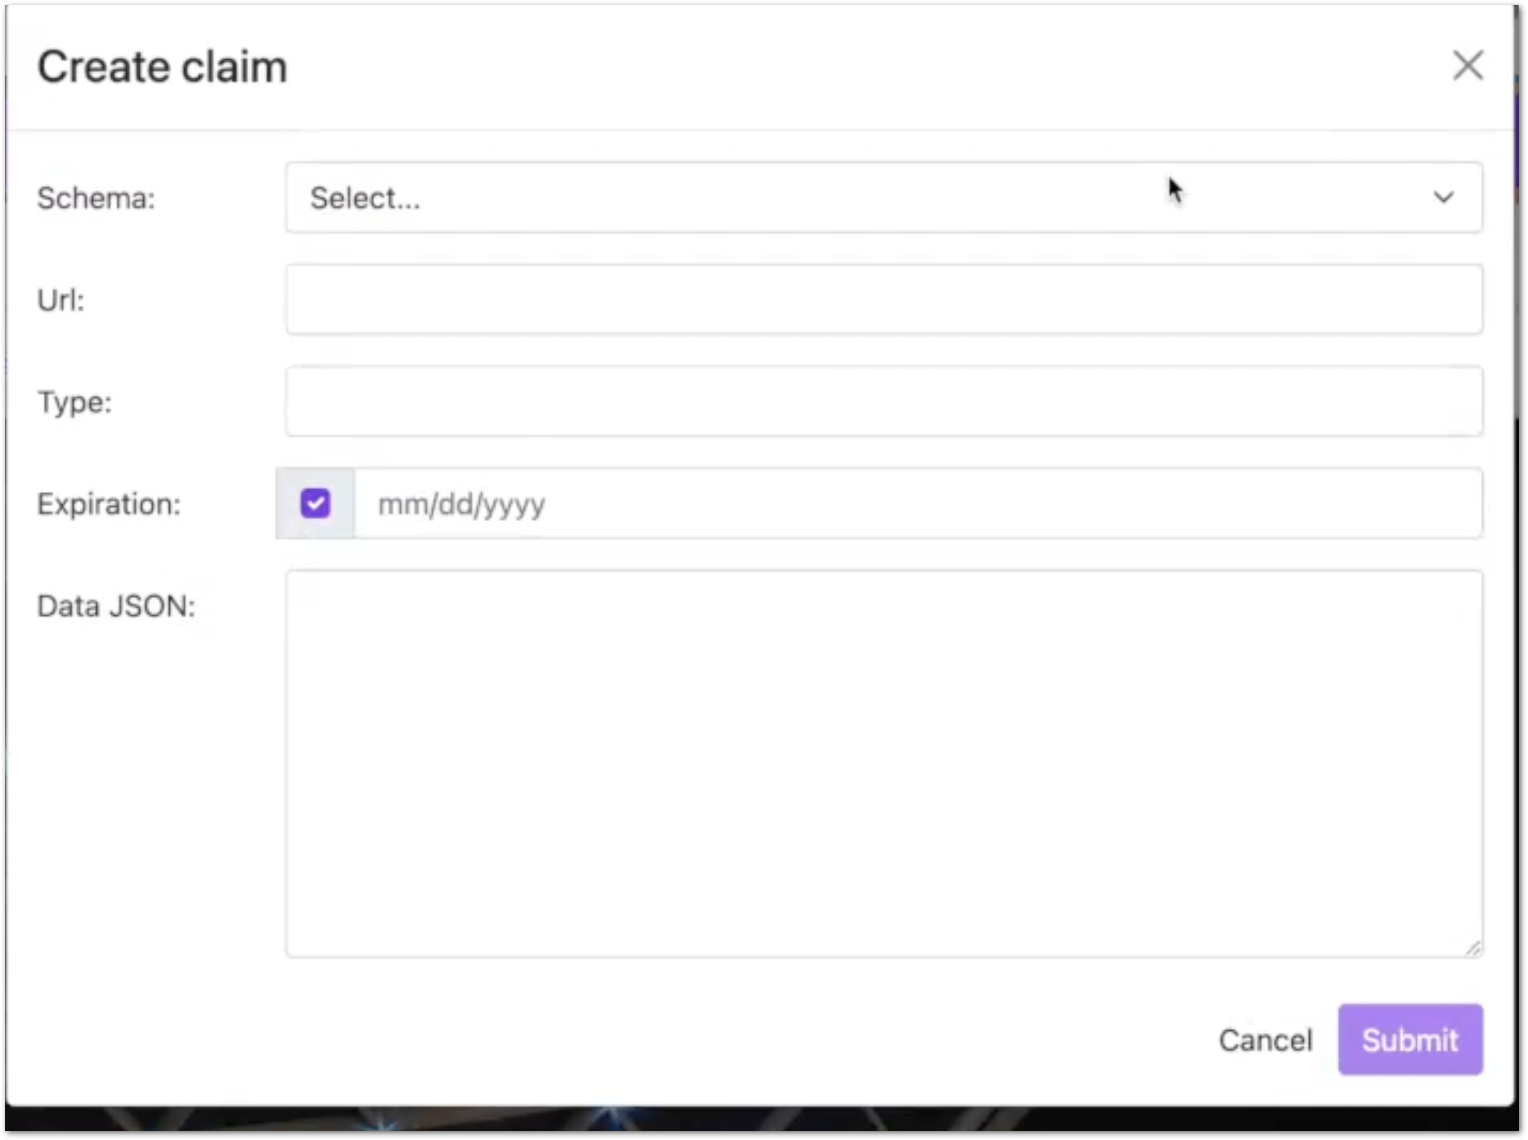
- Select Schema which you need to create credentials. Enter Schema URL, type of credential required, date of expiration of the credential, and other information related to the credential. For example, for a KYCAgeCredential, we can enter birthdate and DocumentType. Click Submit.
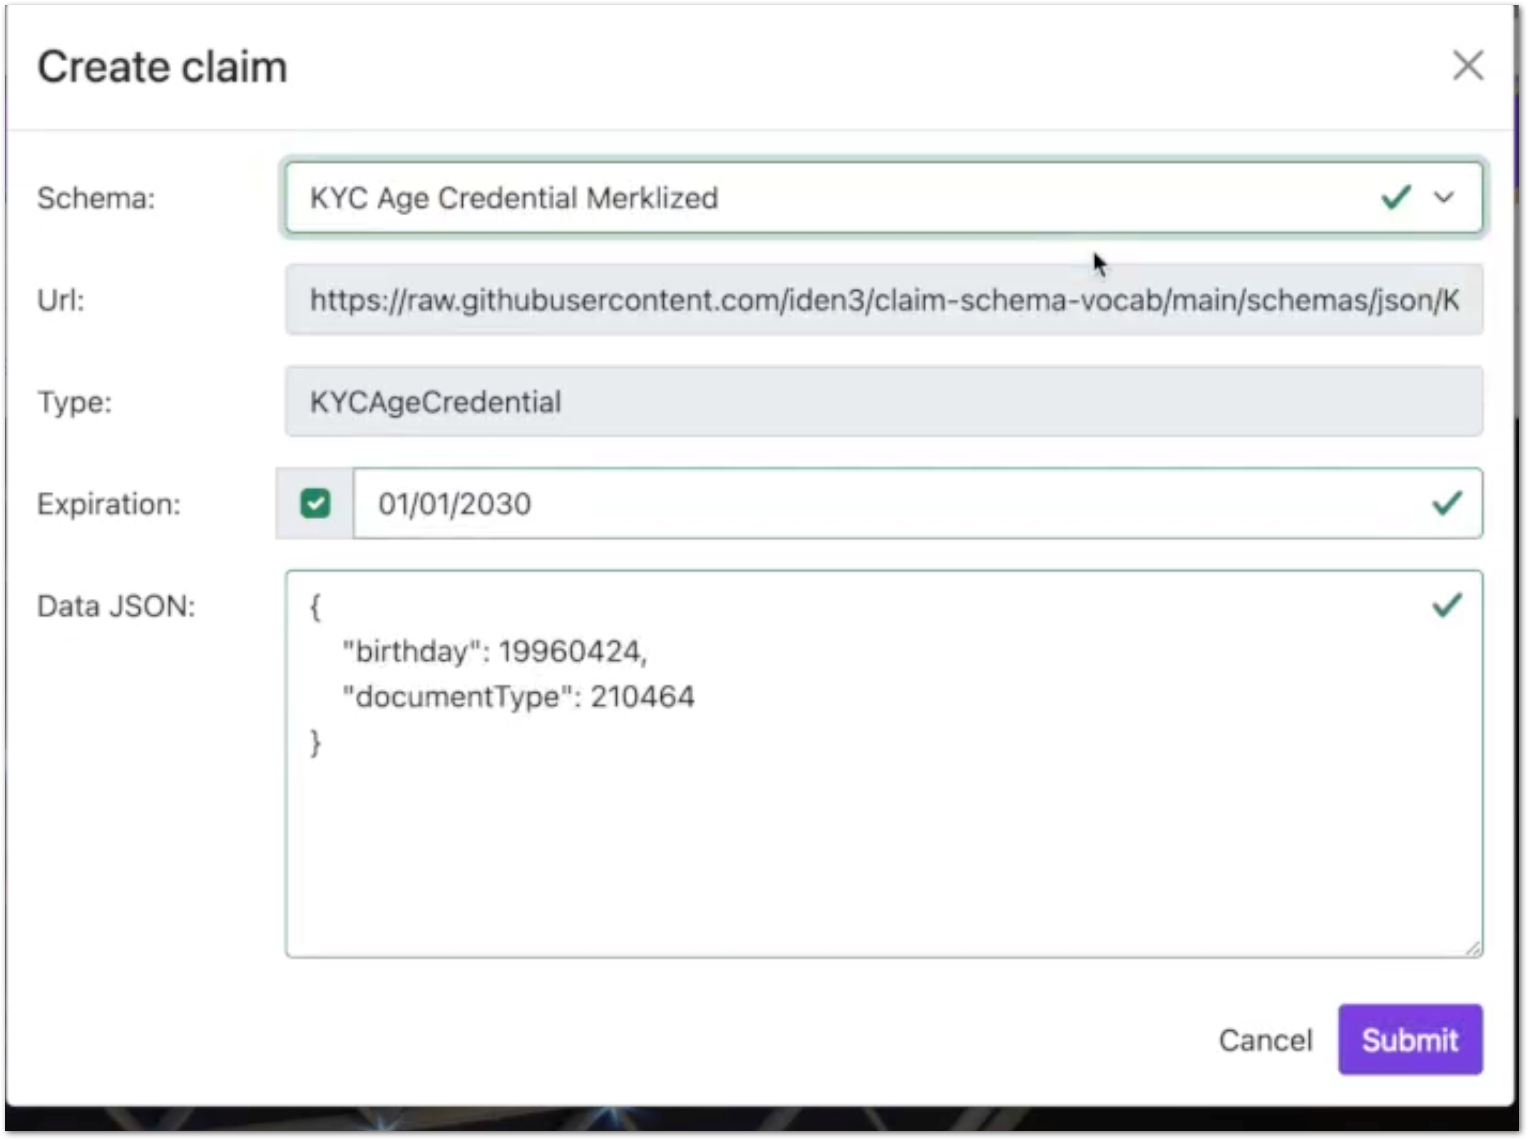
- After some moment, the credential is created successfully.
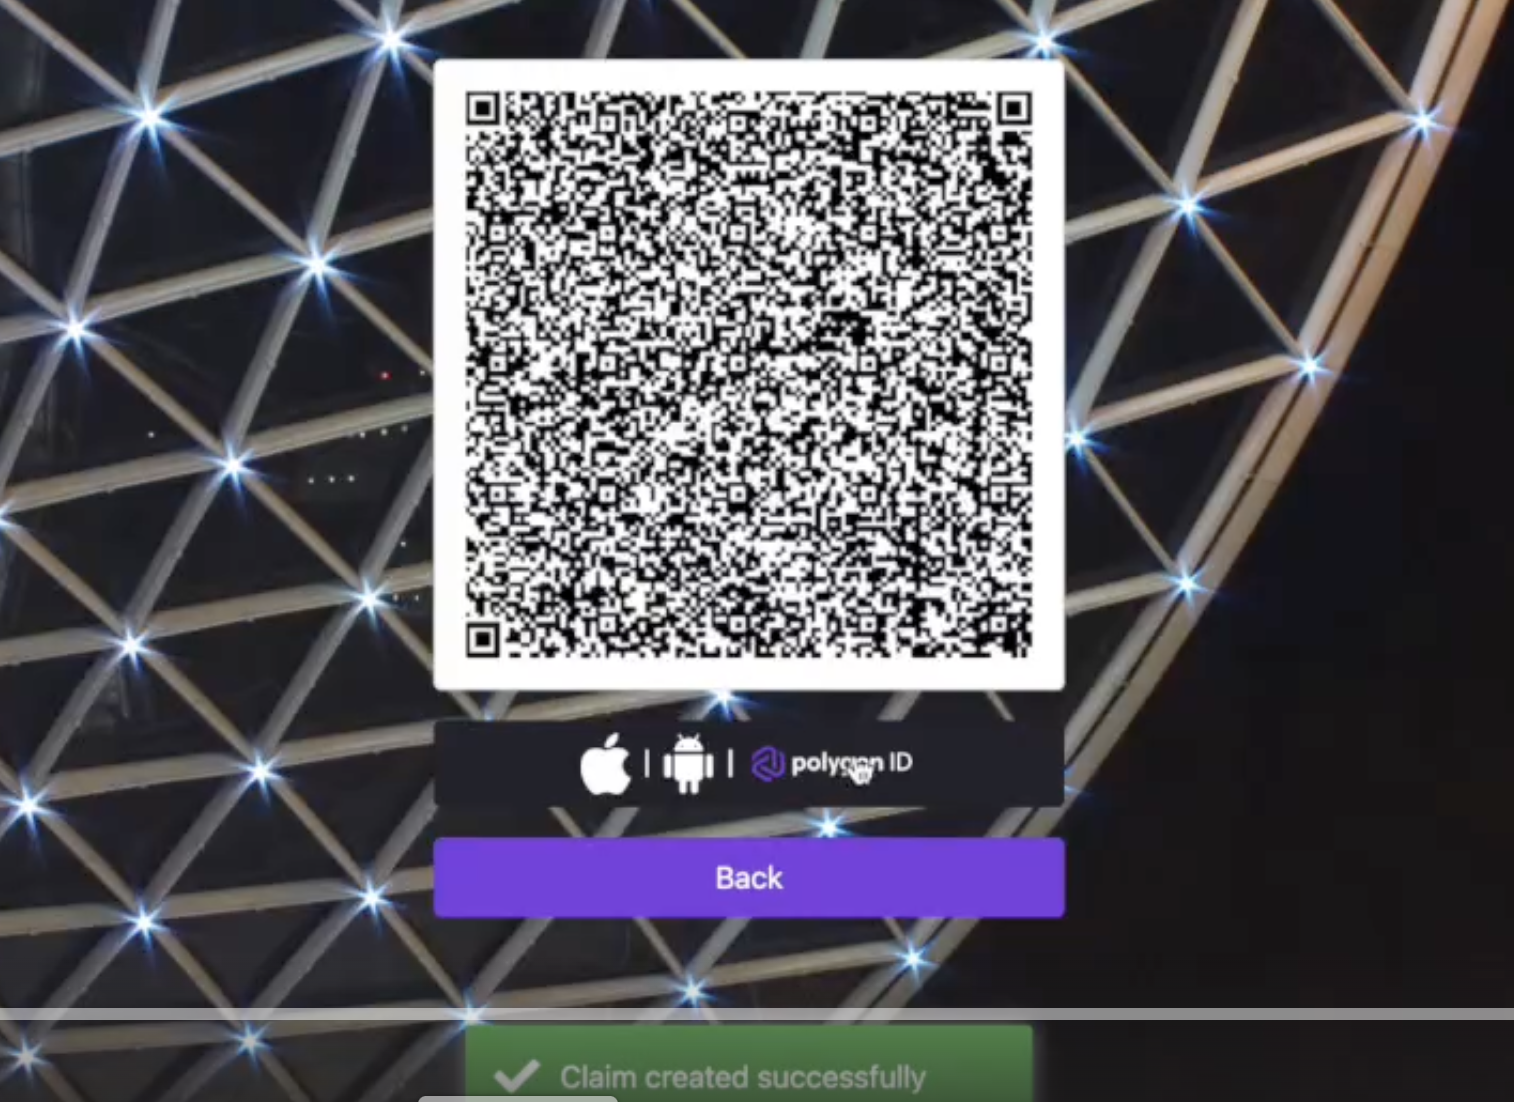
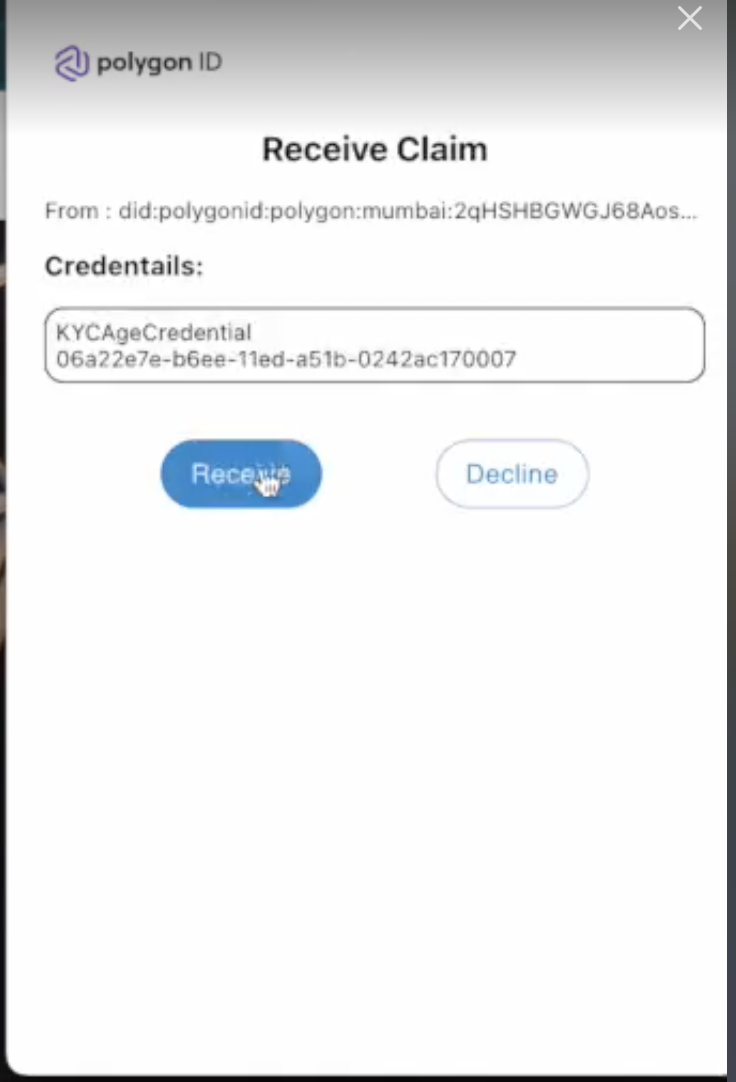
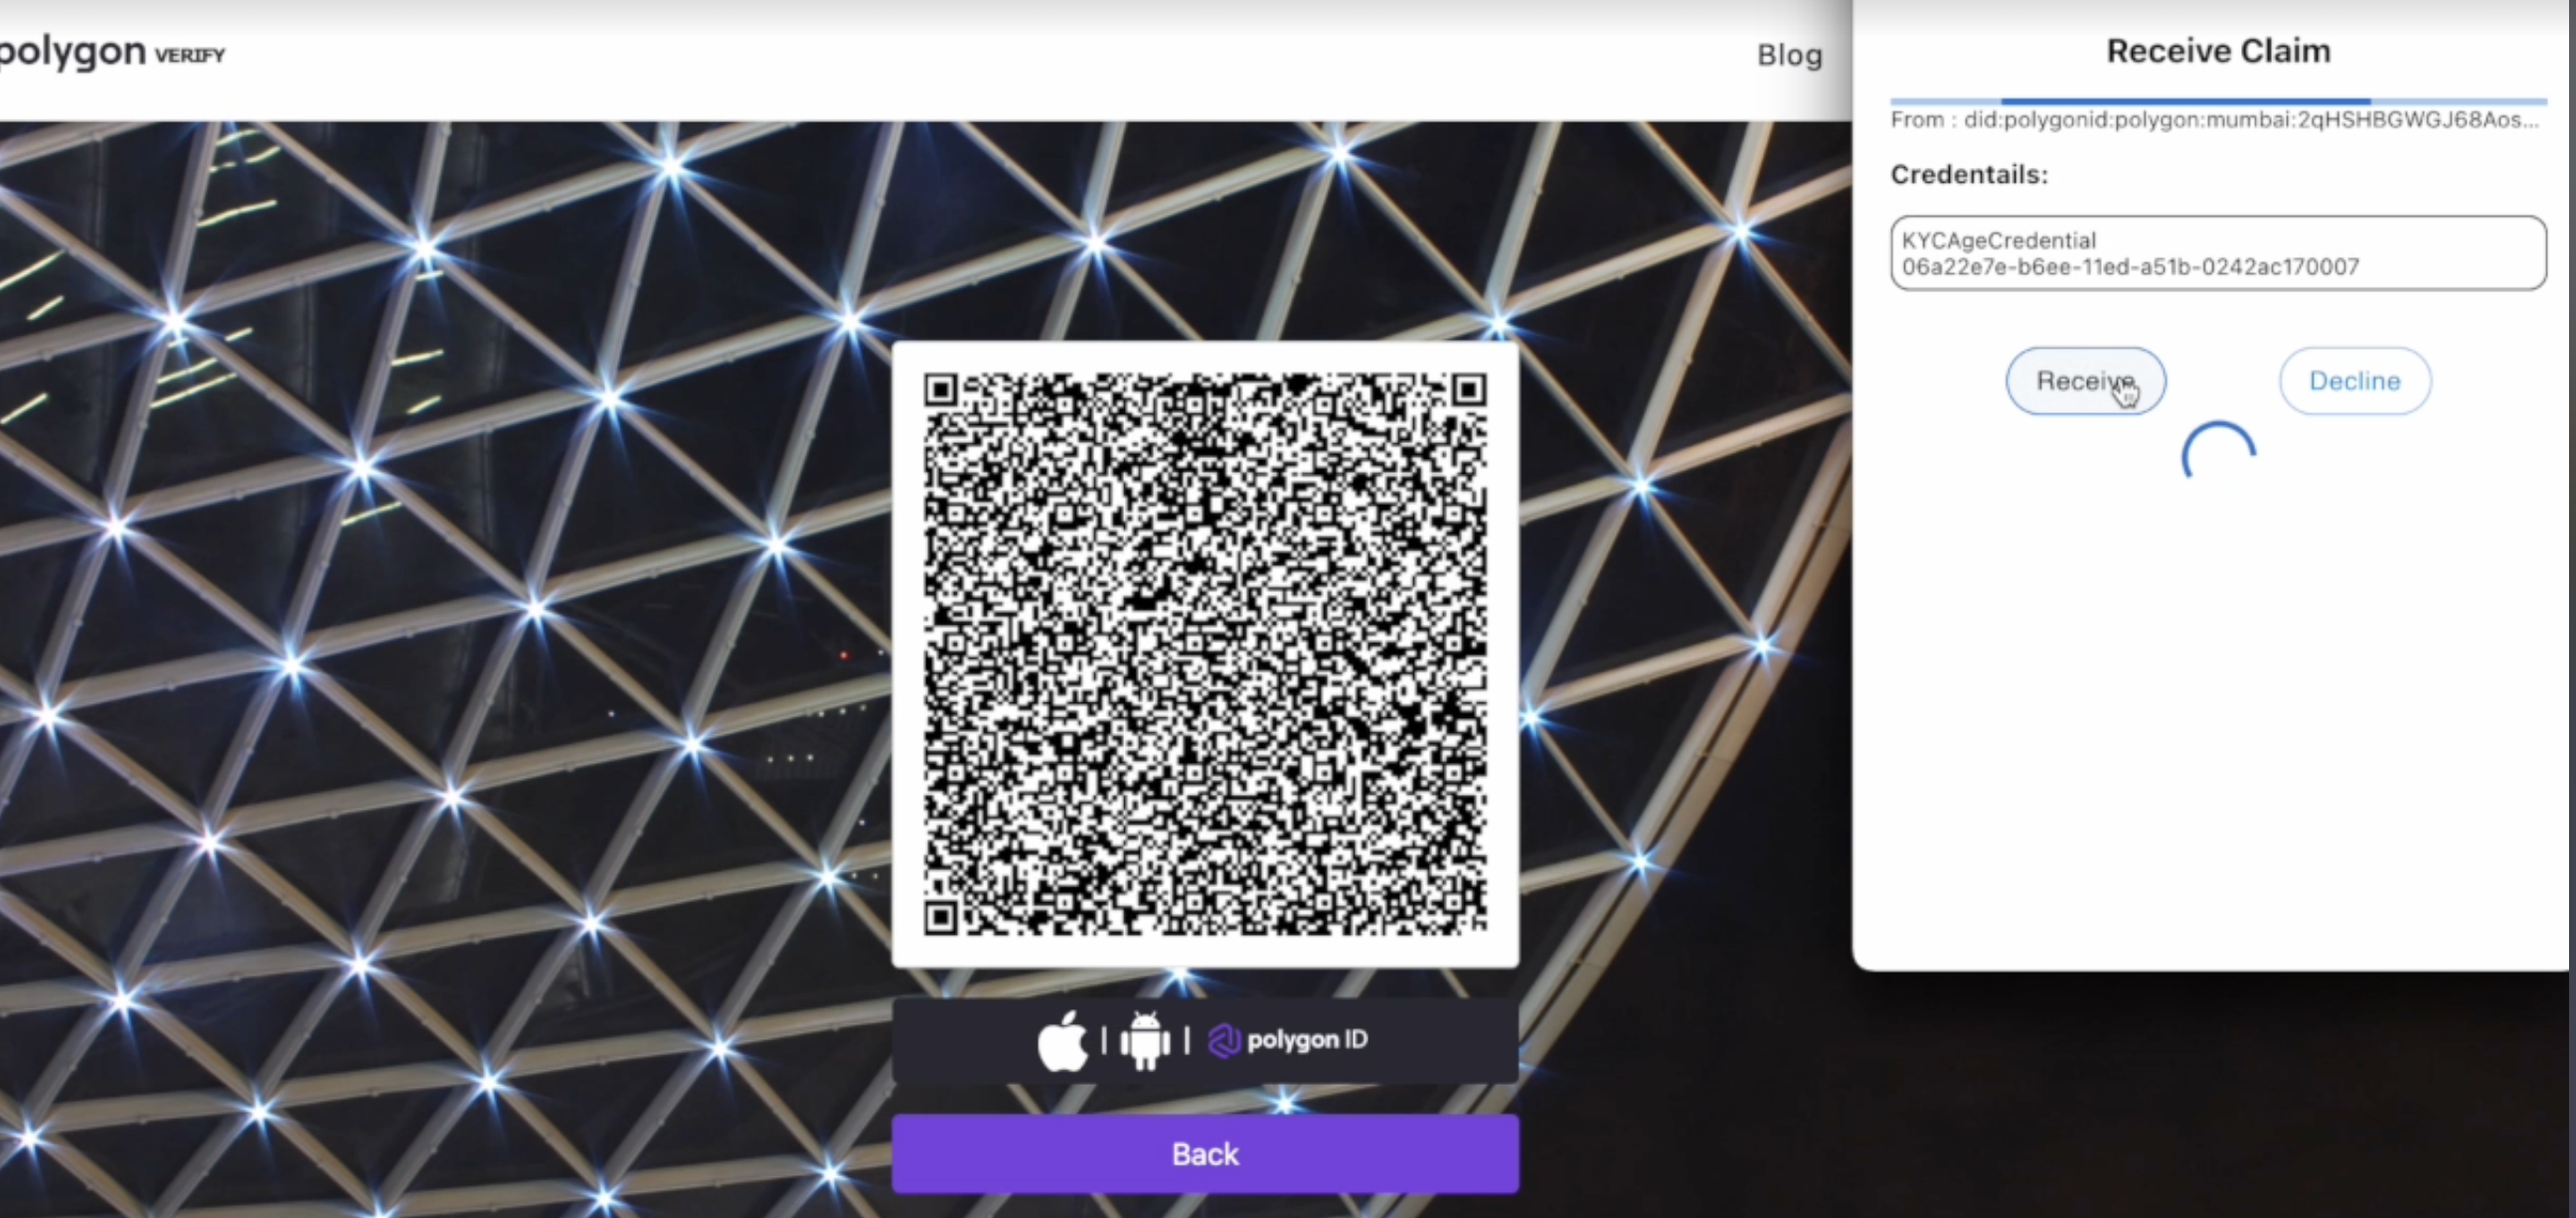
As the credential is now created, the user needs to fetch it to his/her browser wallet. The website displays the QR code. Click the Polygon ID icon to open your browser wallet. On the wallet, click Receive.
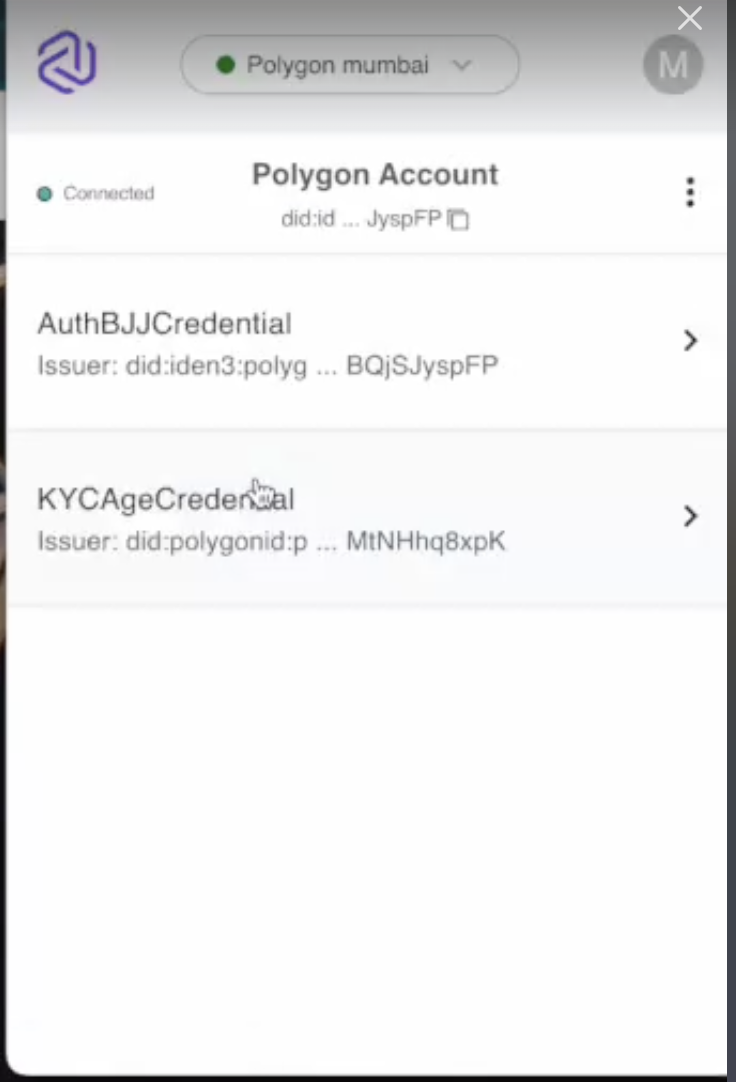
The credential is now saved on your browser wallet.
Steps to Create KYCAgeCredential Signature Proof
- On the Polygon Verify website, select the KYCAgeCredential(less than 2000/01/01)- sig type of credential.
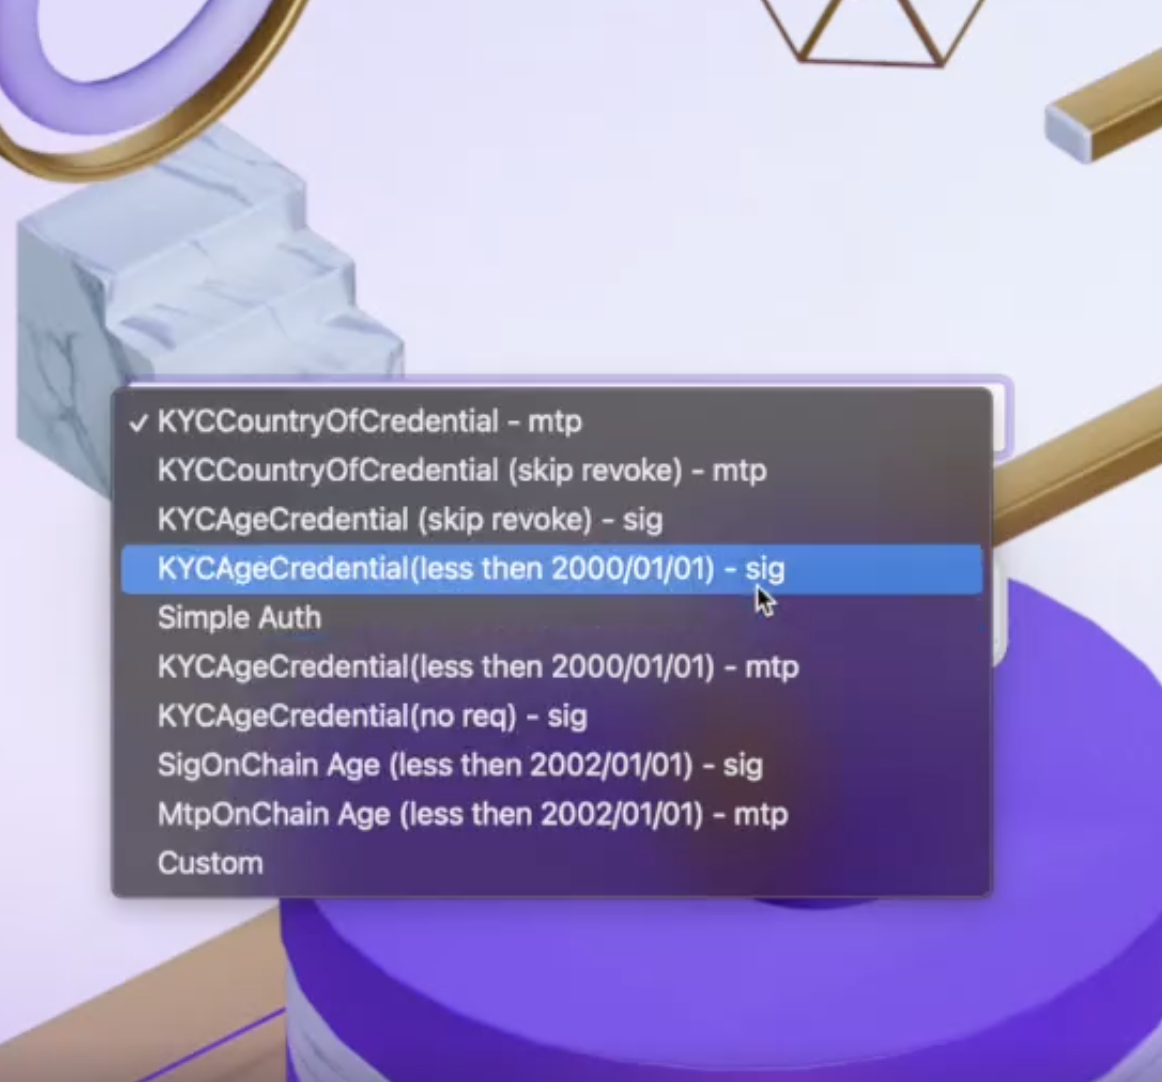
- Click Sign In. This shows the QR code for the credential type you selected in the step above. Click the Polygon ID icon to open your browser wallet.

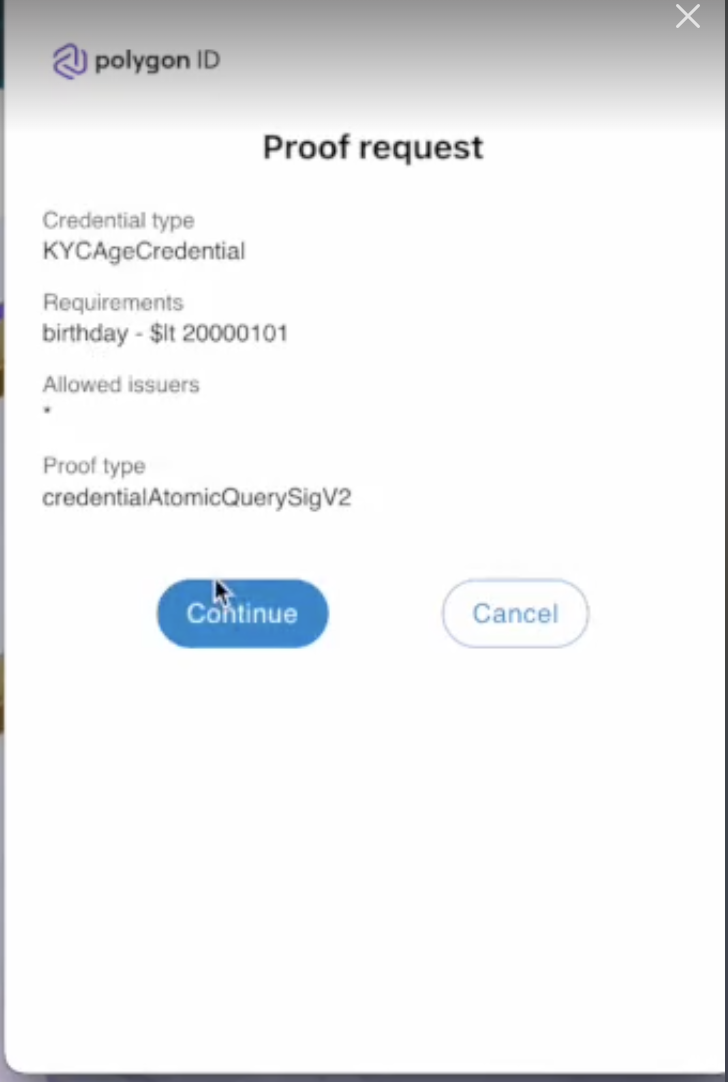
- The browser wallet shows the Proof Request window. Here, you can see the type of credential and proof requested. As you have selected the credential based on signature proof, the Proof Type shown here is type credentialAtomicQuerySigV2. Click Continue.
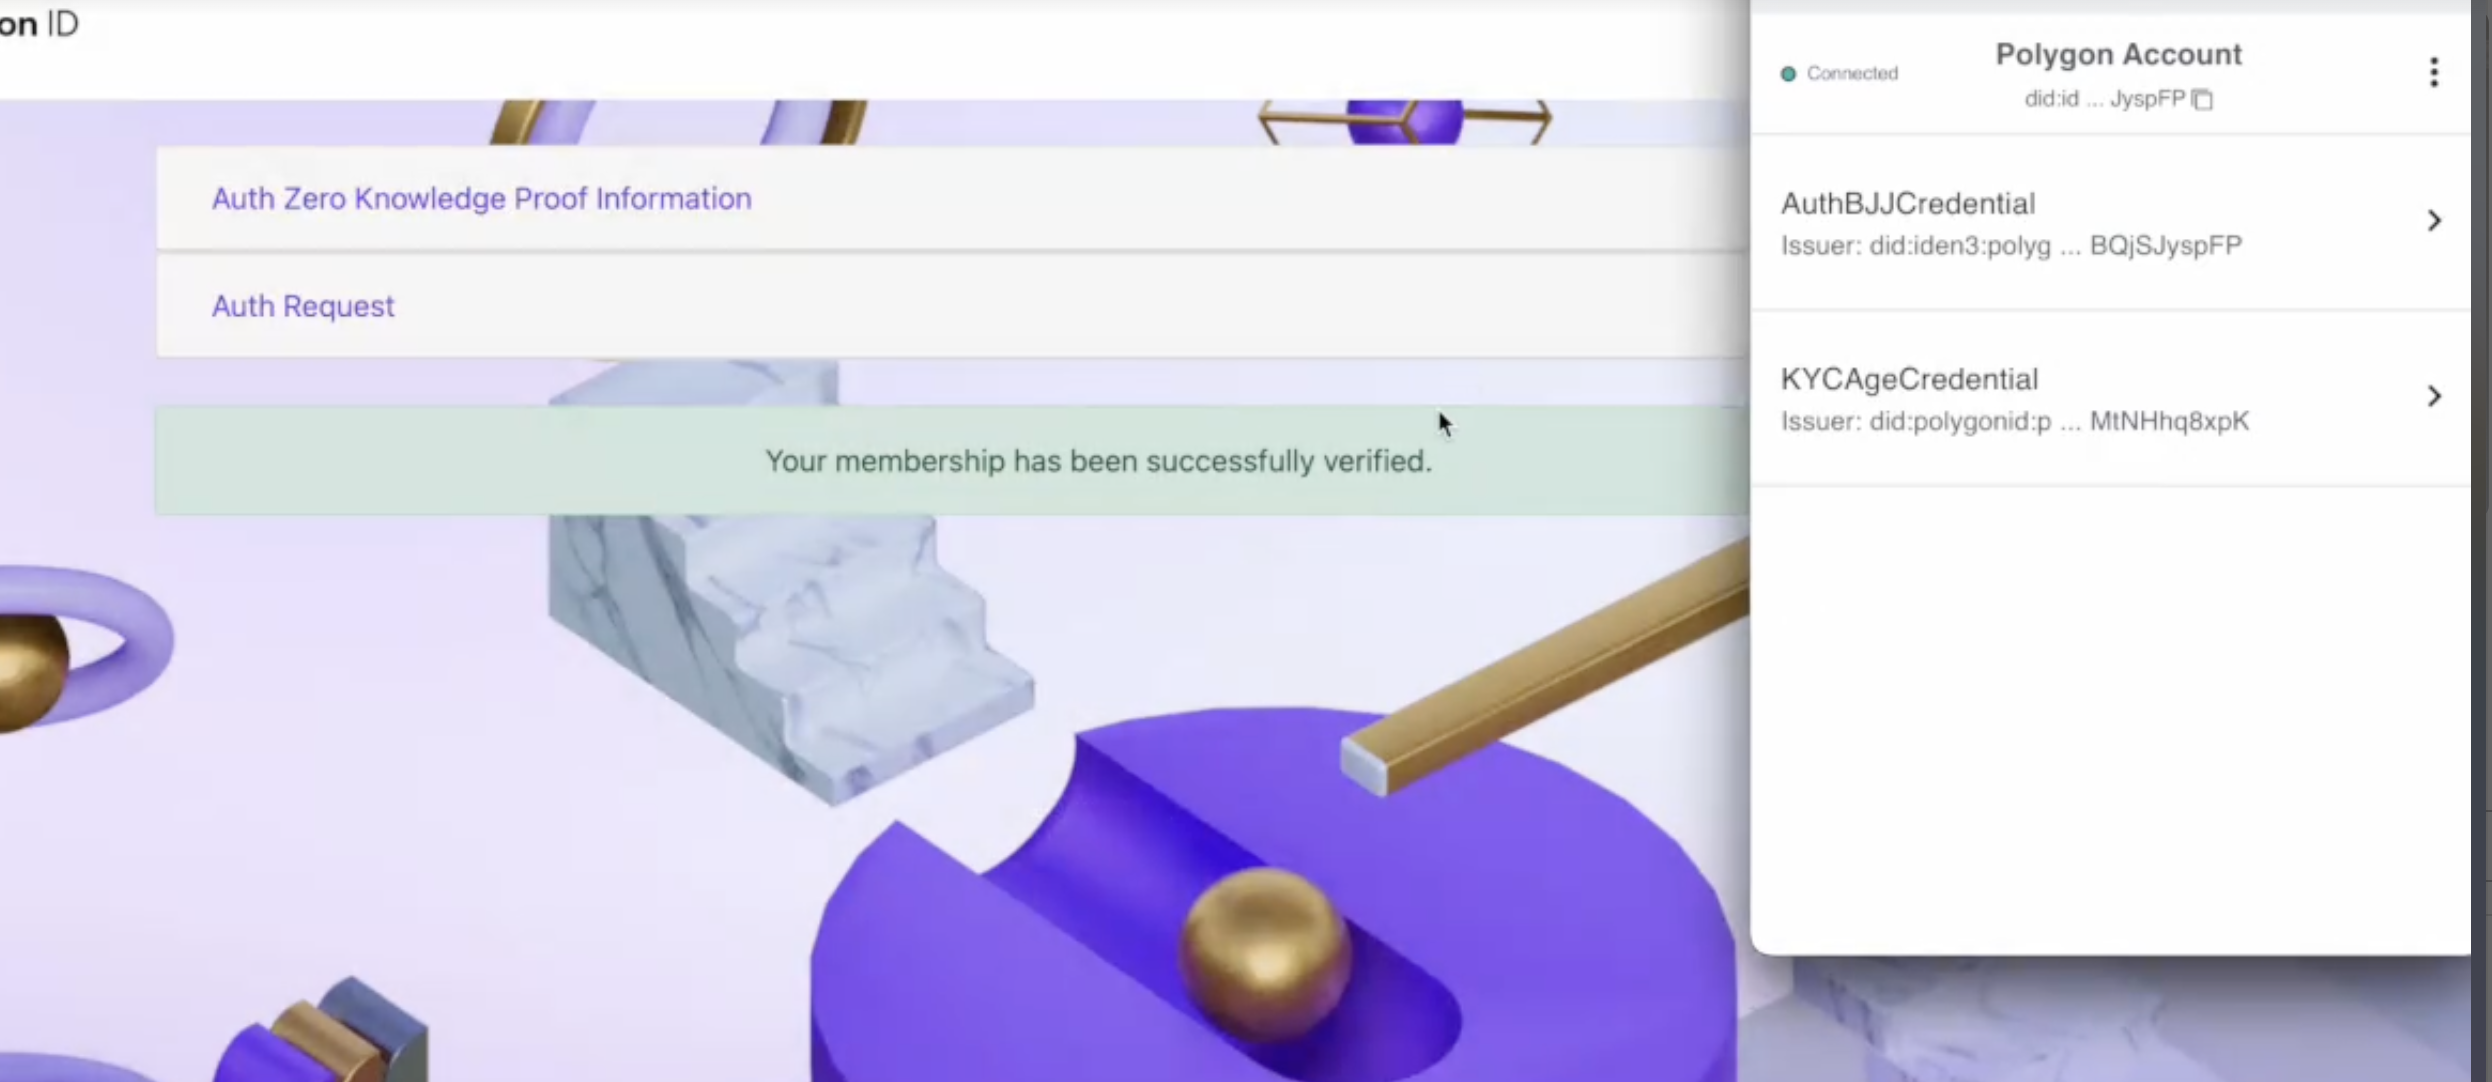
- The website verifies your membership successfully.
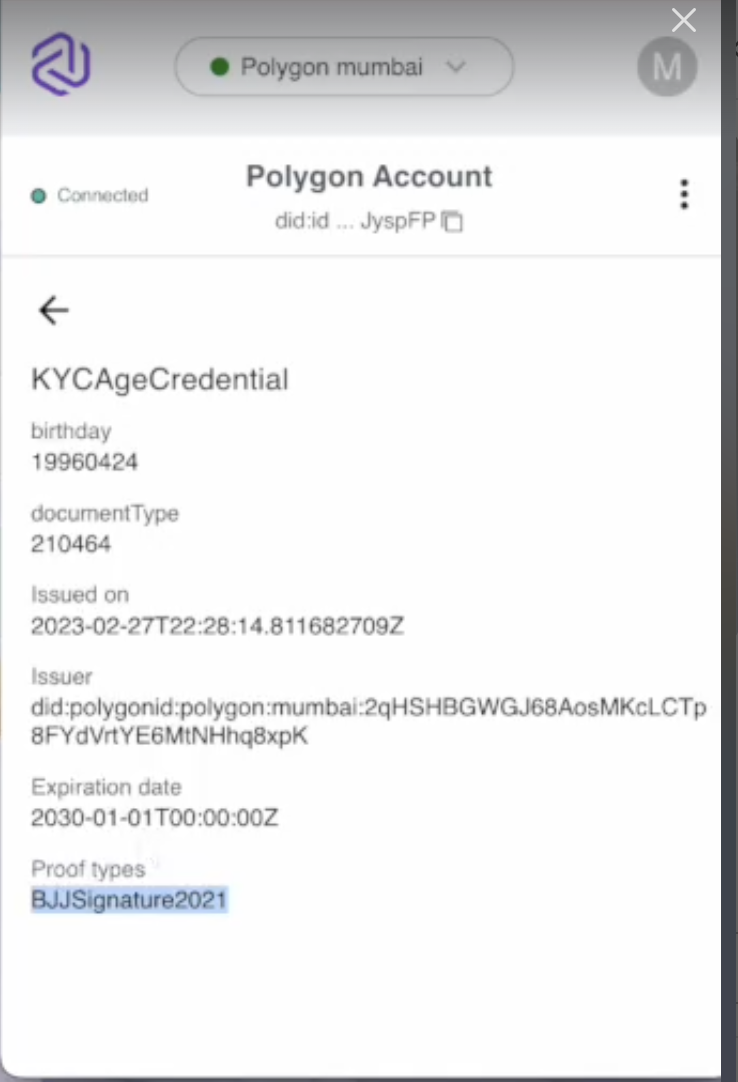
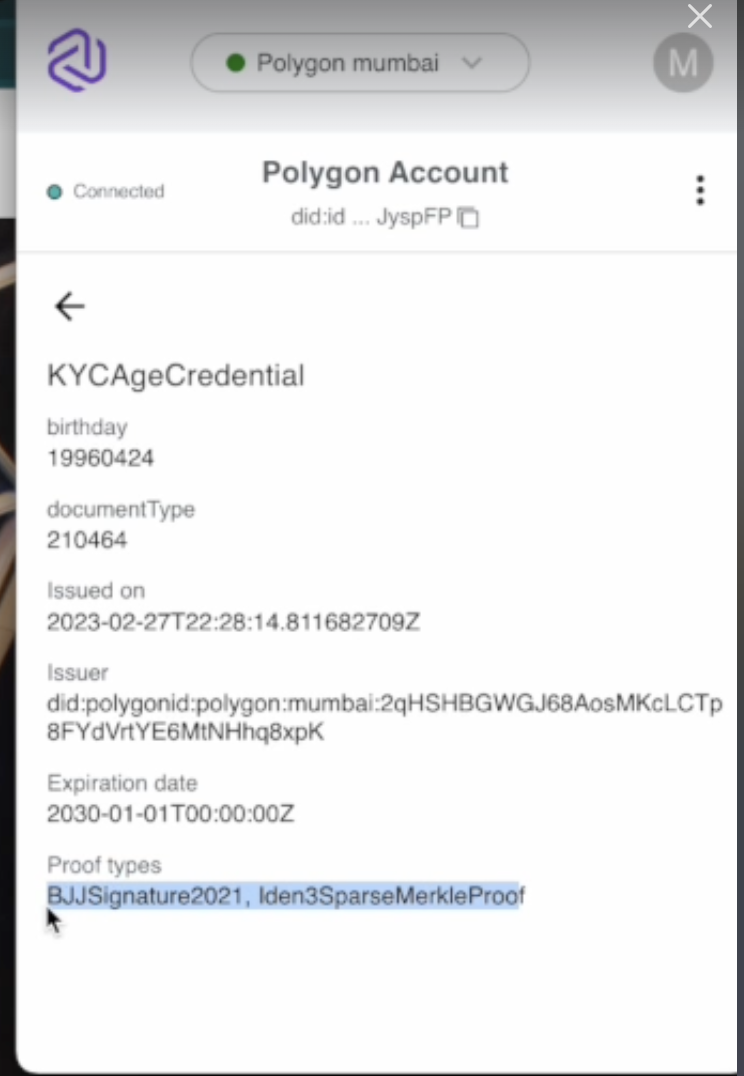
- On the wallet, click KYCAgeCredential to view its details including birthday, documentType, Issuer (DID of Issuer), Issued On (Date of Issuance), Expiration Date, and Proof types (in this case, it is BJJSignature2021).
On the Polygon Verify website, click Auth Info to view details of the Auth Request (authorization requested by the user).
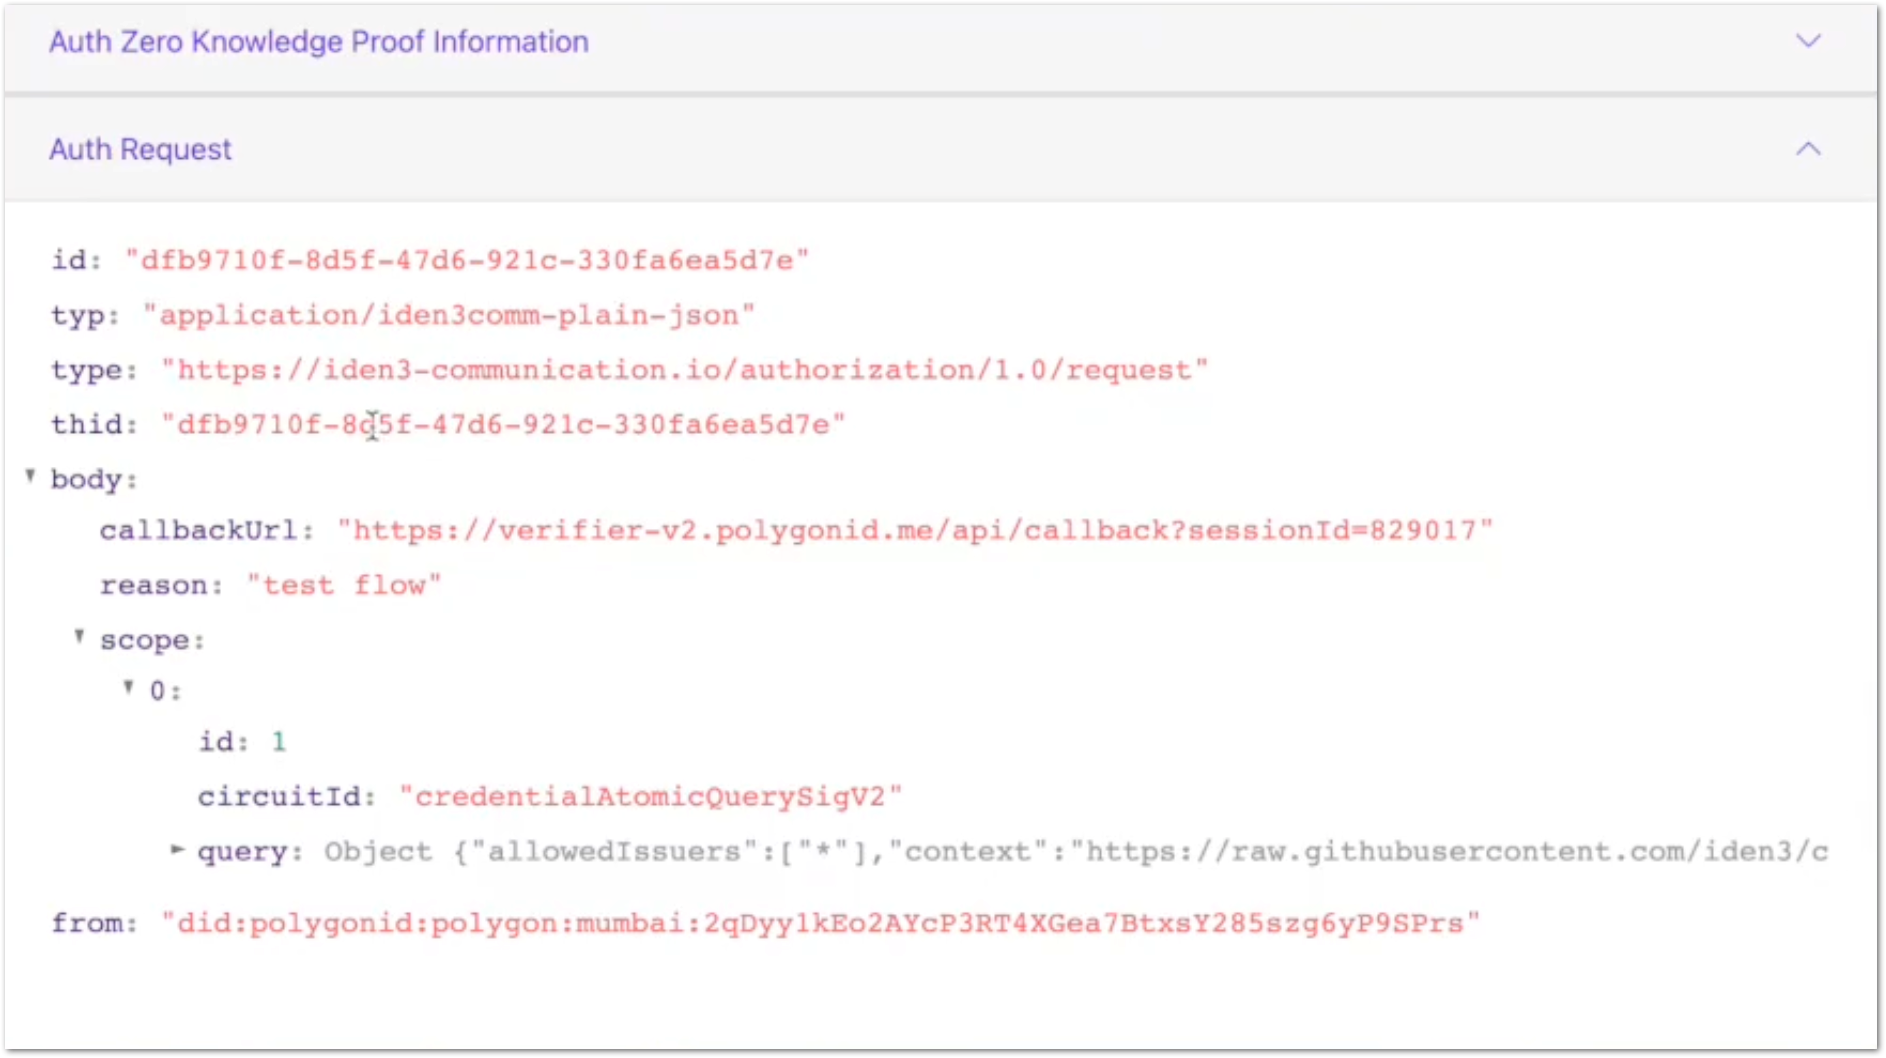
Scroll down the page to view Auth Response. Here, you can see the proof and the public signals (used to generate the proof), and the JWZ token. Copy the JWZ token and paste it on the Polygon ID JWZ Validator site. Click Validate.
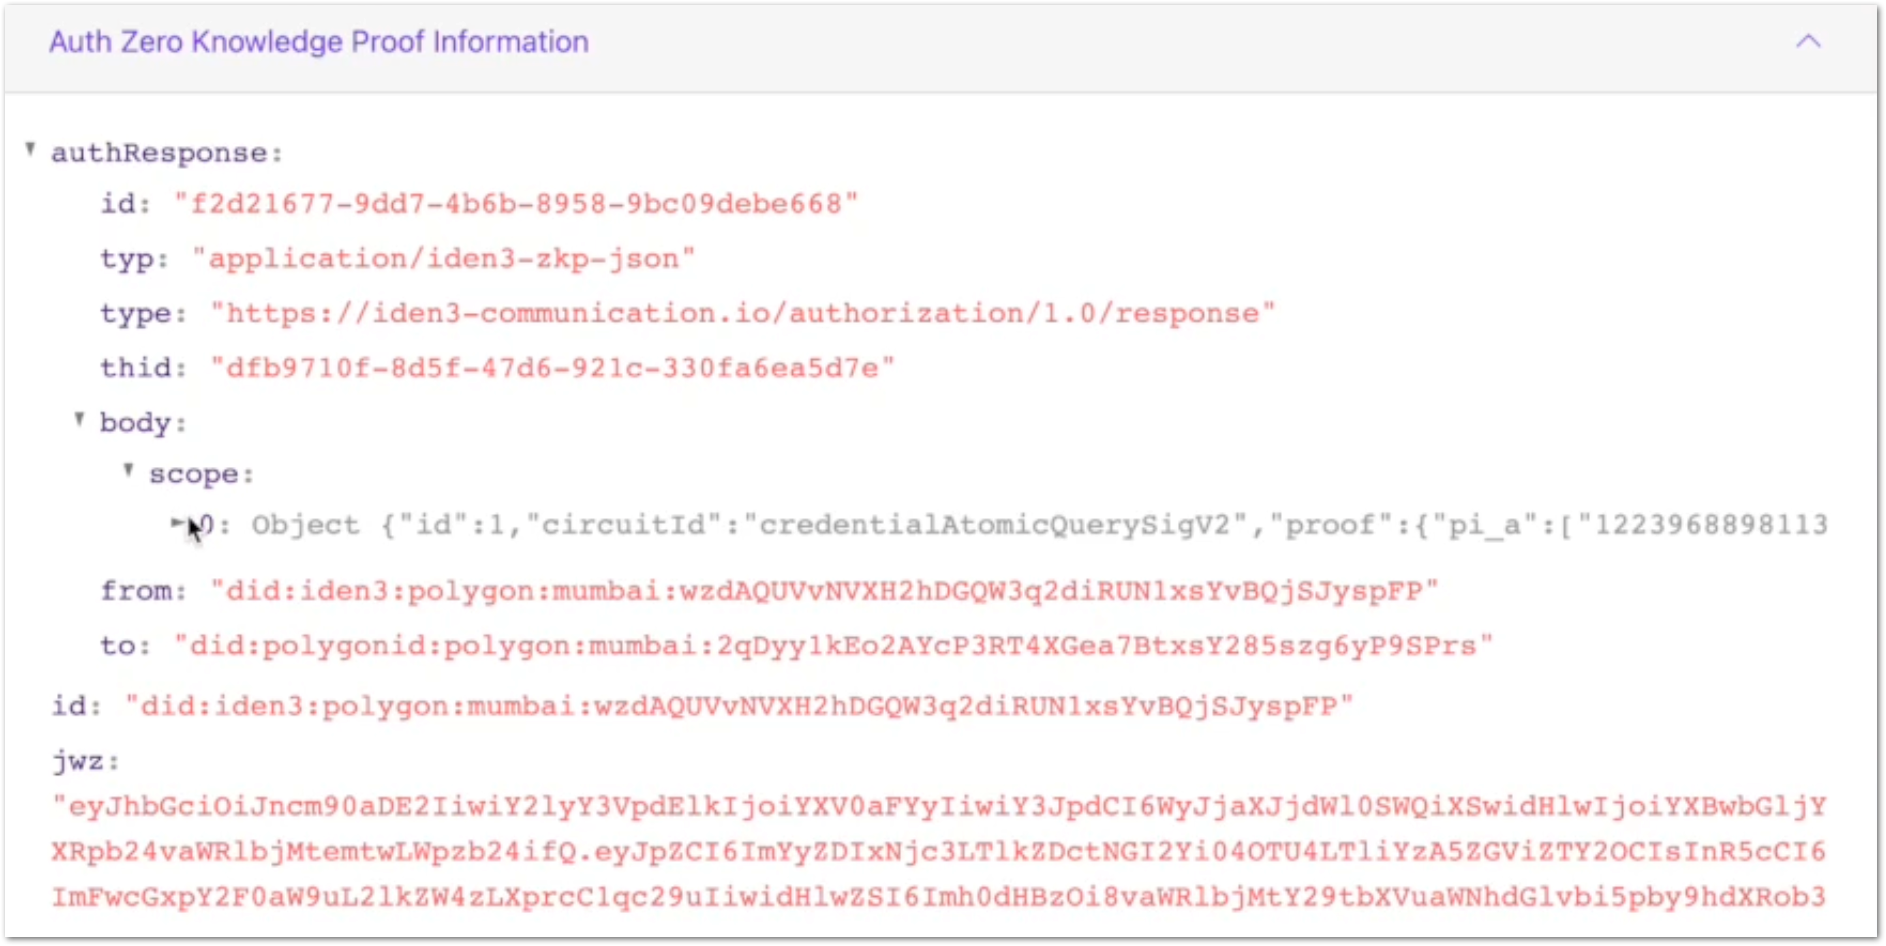
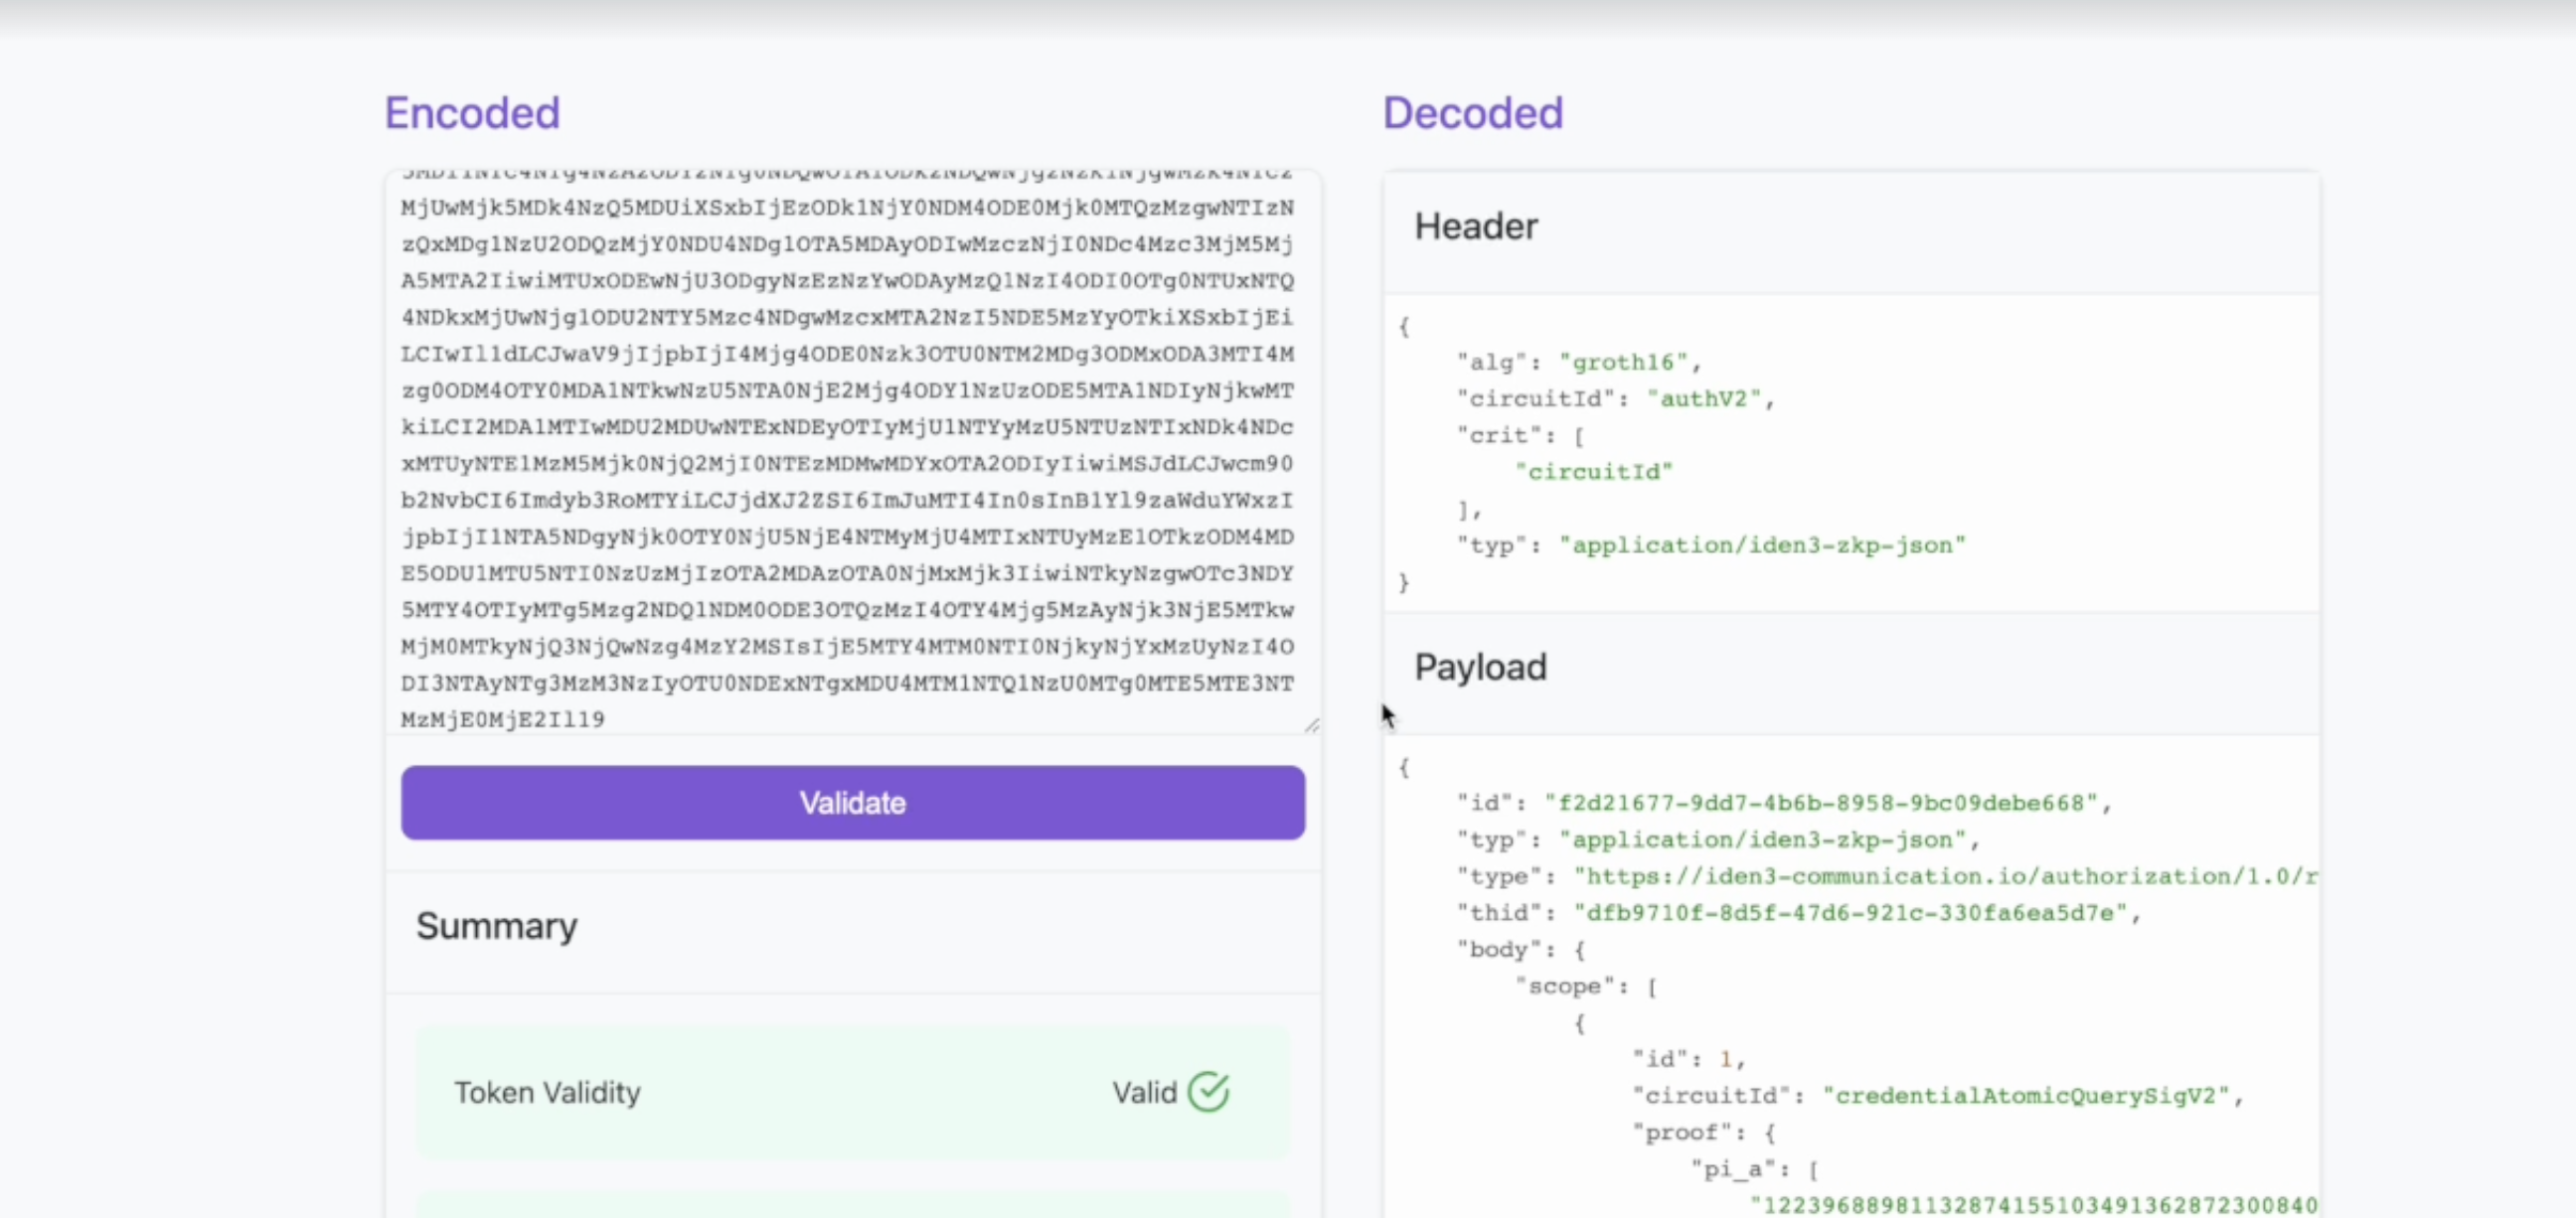
Upon validation, the JWZ token is broken down into three parts: Header, Payload, and Auth Proof.
Header and Payload:
Auth Proof:
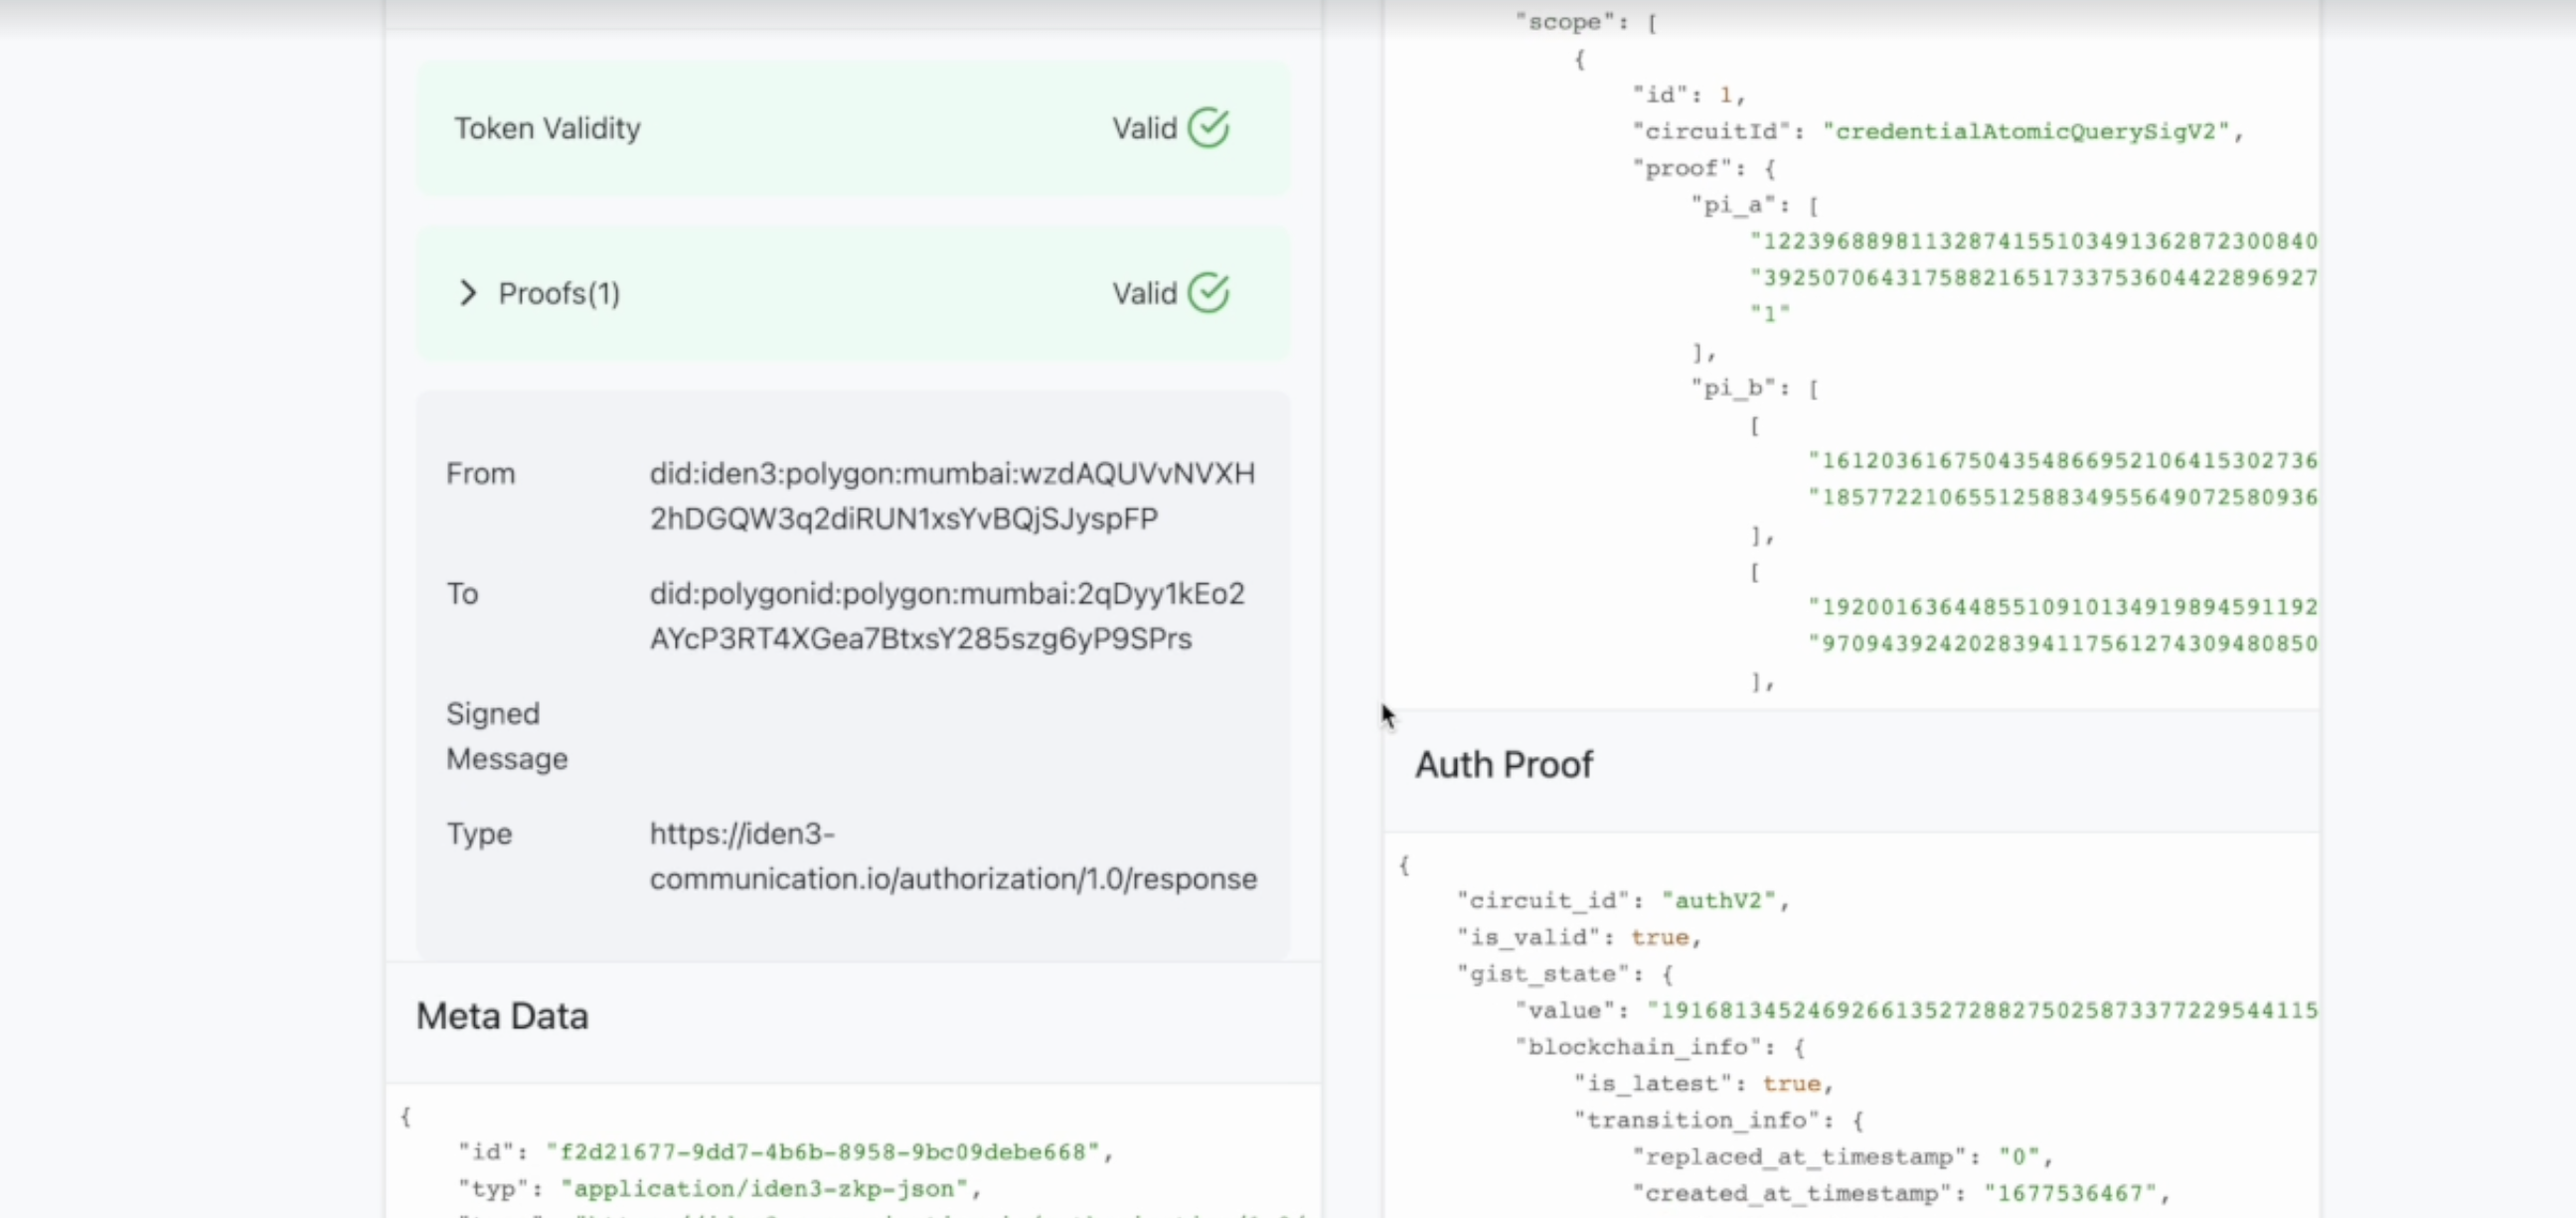
You can see proof along with other data including from and to fields. The from field shows the DID that sent the proof request. It must match your wallet's DID. The to represents the Verifier DID to whom the proof request has been sent.
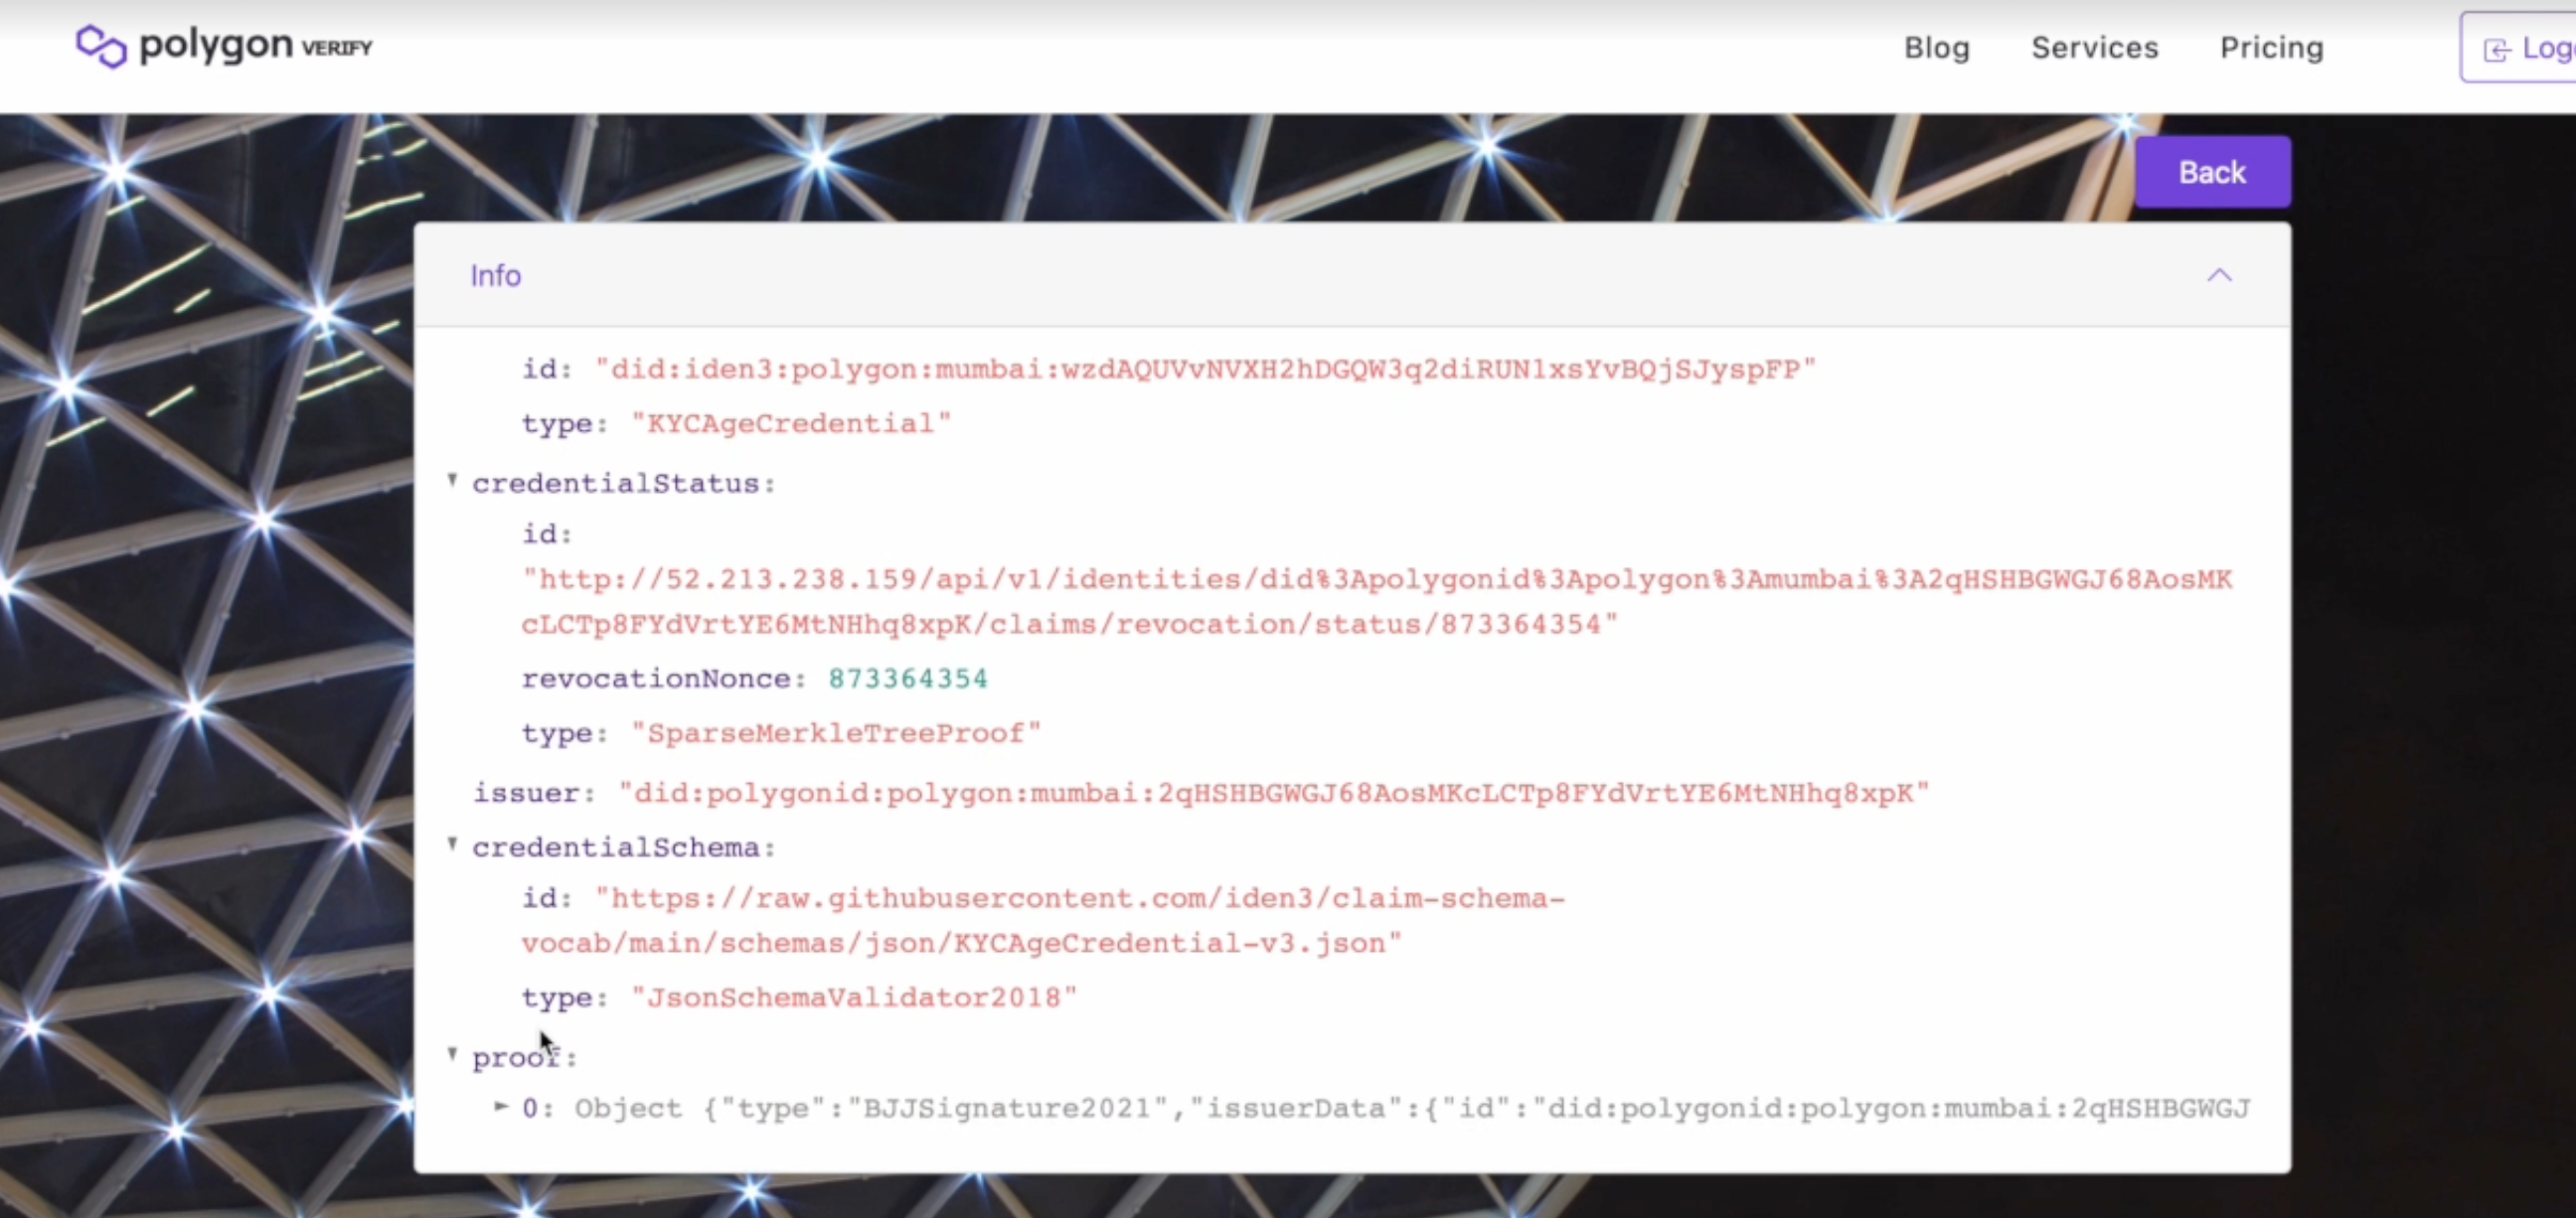
Wait for the proof to get published on-chain. After that, on the website, you can view the credential details that show state information such as txId (ID of the transaction done from a wallet to complete publishing of the state on-chain), blockTimestamp (time at which block was created), blockNumber, rootofRoots (Roots tree), claimsTreeRoot (Claims tree), revocationTreeRoot(Revocation tree):
Credential details:
Below the QR code, click the Polygon ID icon to open your browser wallet. On your wallet, click Receive to fetch and save the credential to your wallet.
Click on your KYCAgeCredential to view its details. You can now see that you have two types of proofs in your wallet: BJJSignature2021 and iden3SparseMerkleTreeProof
Steps to Create KYCAgeCredential Merkle Tree Proof
On the Polygon Verify website, select the KYCAgeCredential(less than 2000/01/01)- mtp credential type.
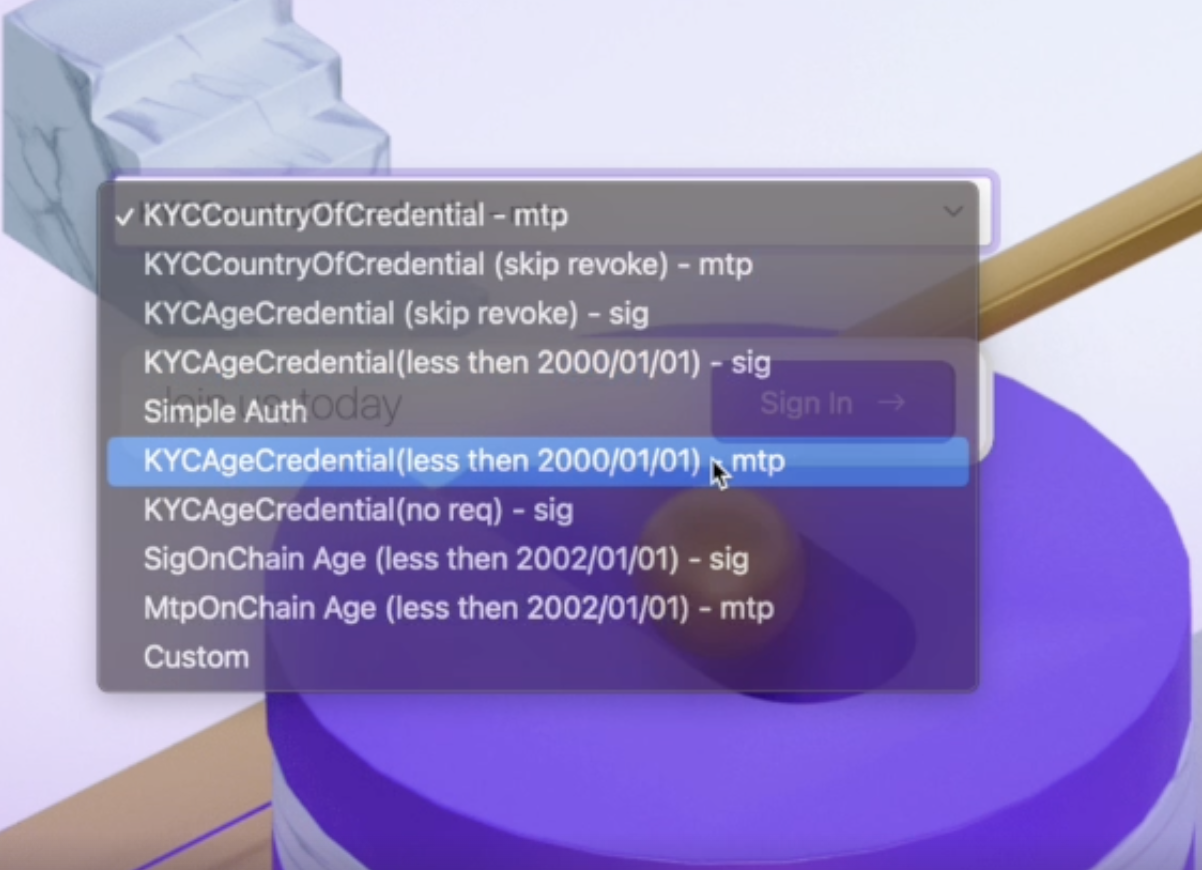
Click Sign In. This shows the QR code for the credential type you selected in the step above. Click the Polygon ID icon to open your browser wallet.

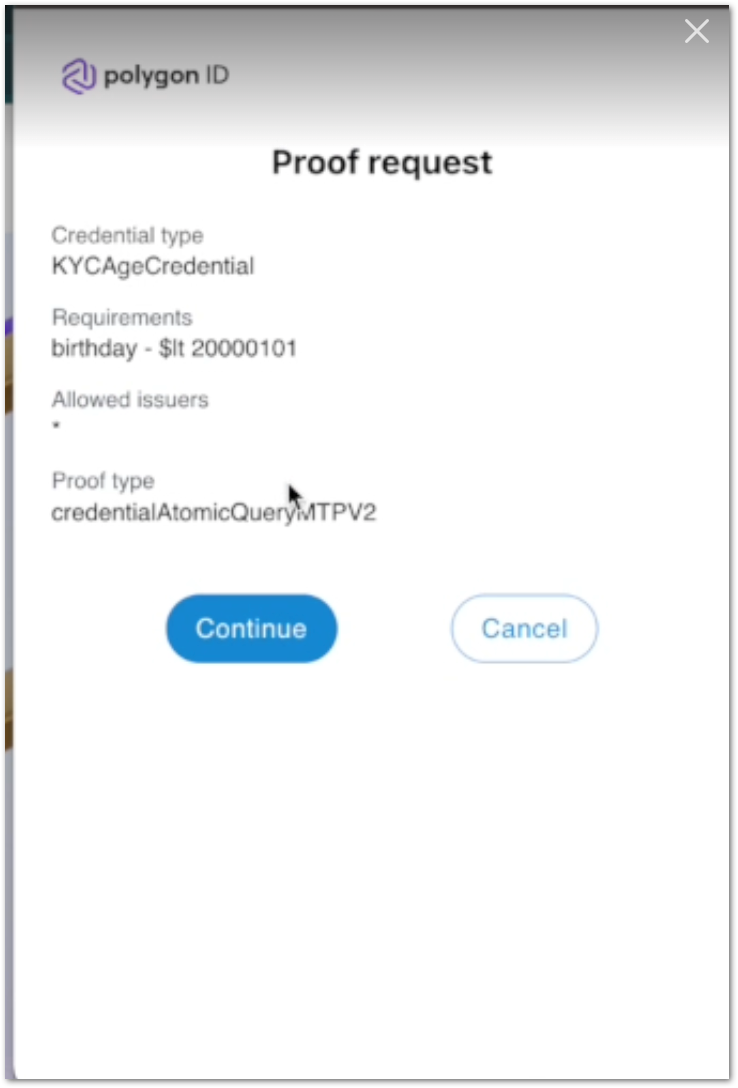
- The browser wallet shows the Proof Request window. Here, you can see the type of credential and proof requested. As you have selected the credential based on MTP proof, the Proof Type shown here is credentialAtomicQueryMTPV2. Click Continue.
- The website verifies your membership successfully.

On the Polygon Verify website, click Auth Info to view details of the Auth Request (authorization requested by the user).
Scroll down the page to view Auth Response. Here, you can see the proof, the public signals (used to generate the proof), and the JWZ token. Copy the JWZ token and paste it on the Polygon ID JWZ Validator site. Click Validate.
Upon validation, the JWZ token is broken down into three parts: Header, Payload, and Auth Proof.
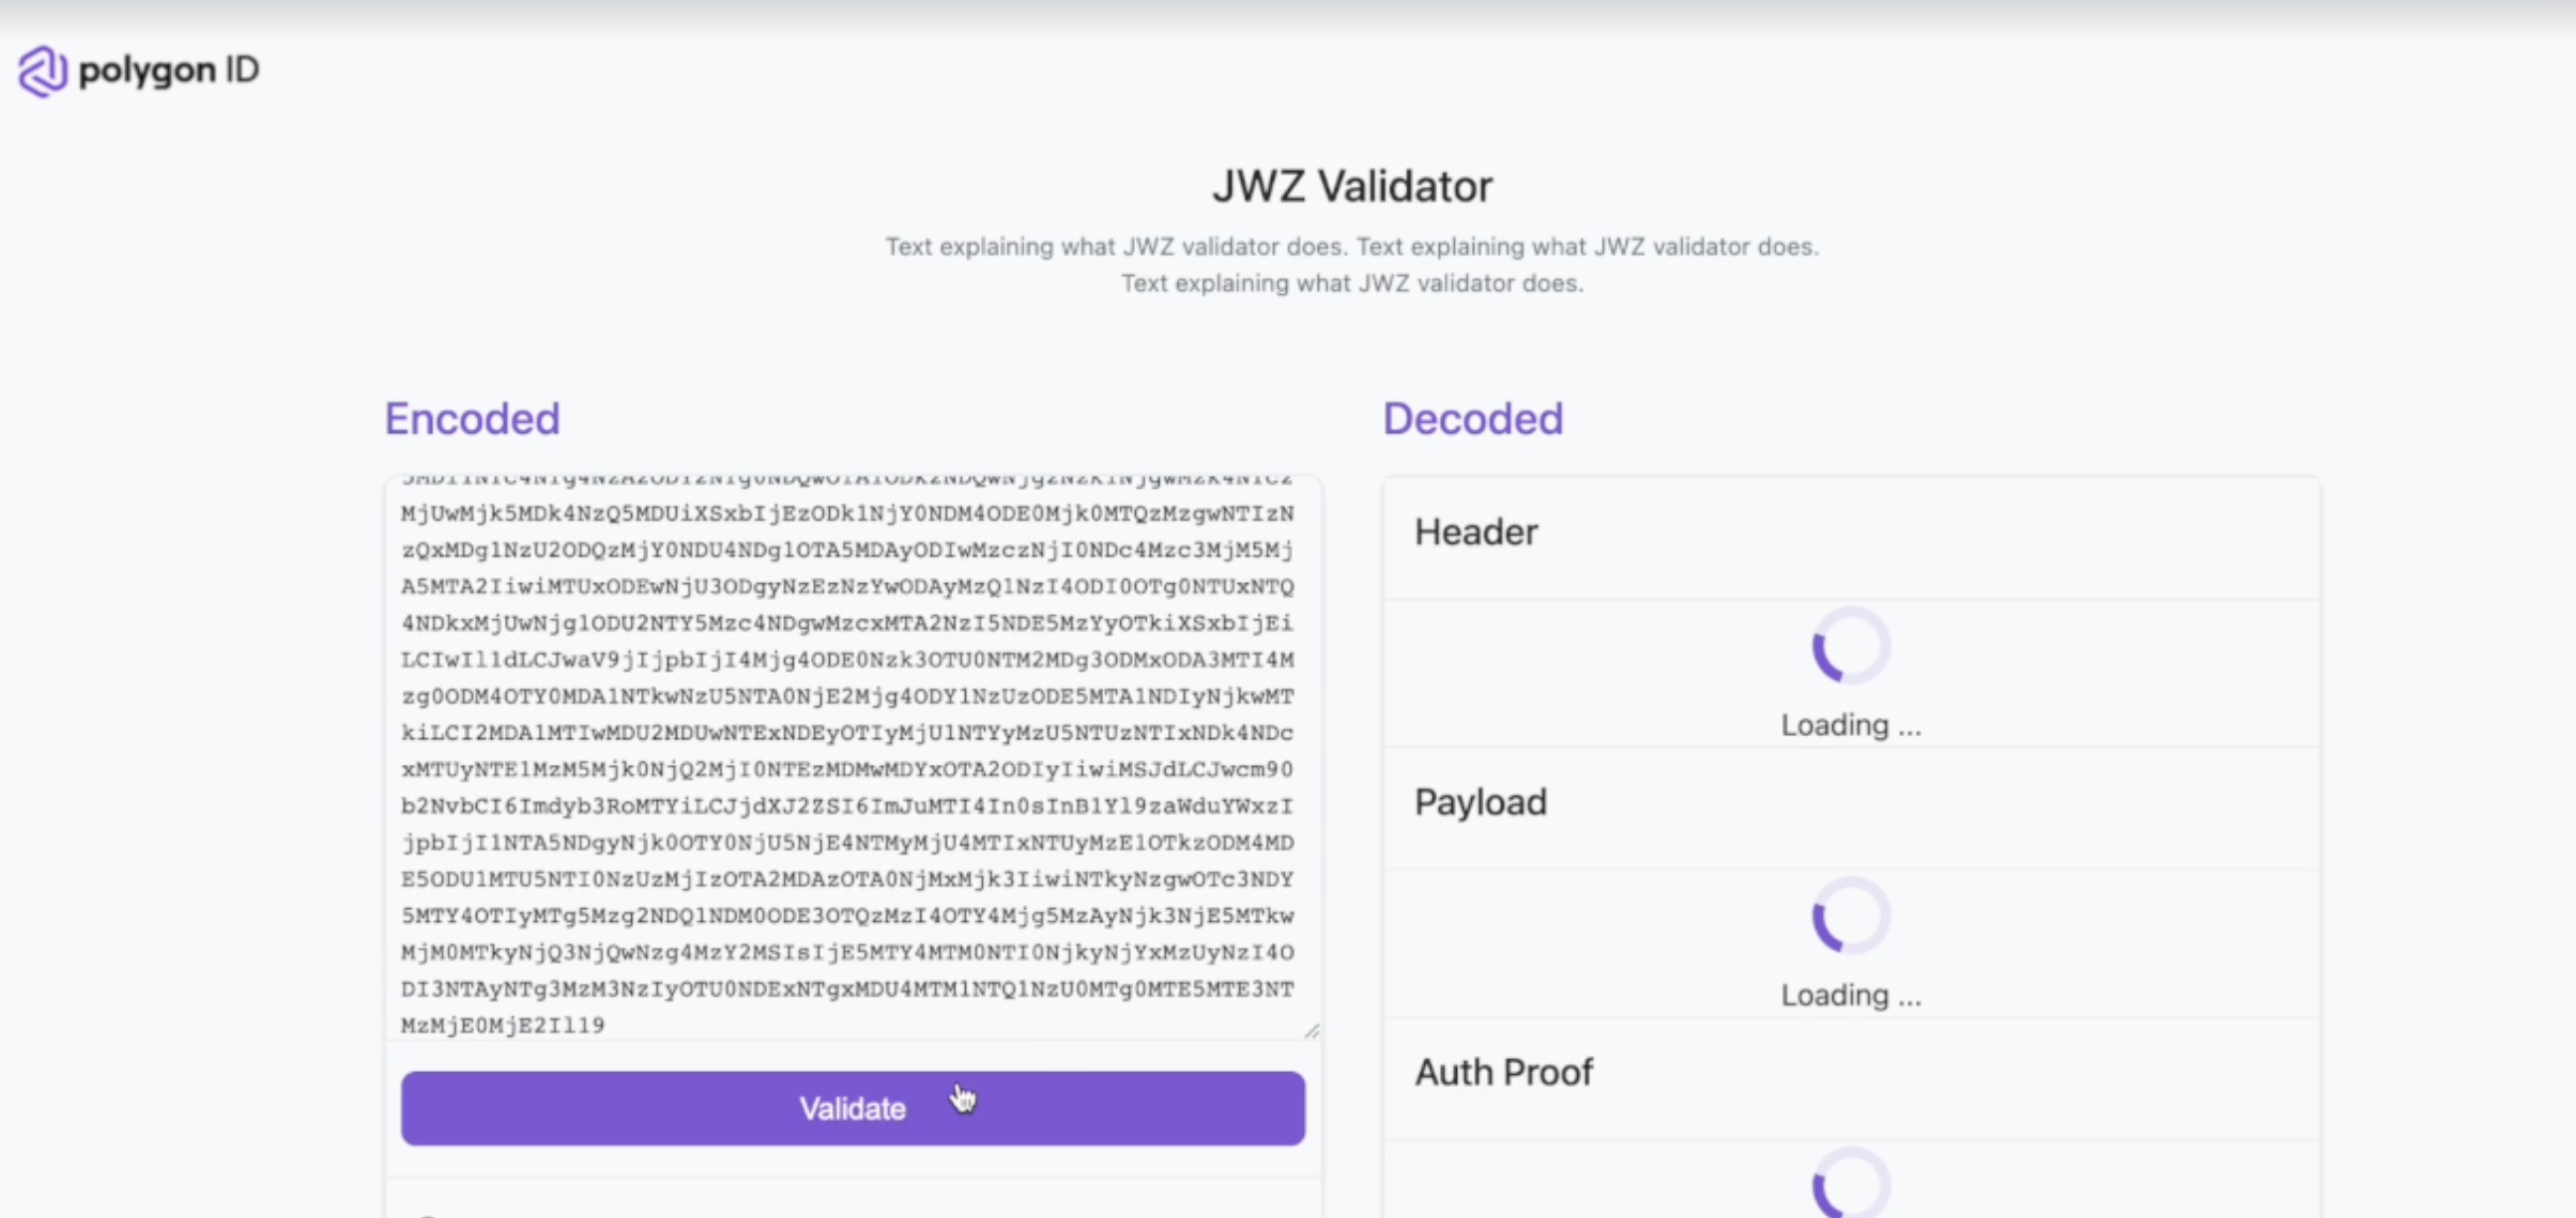
Header and Payload:

Auth Proof:
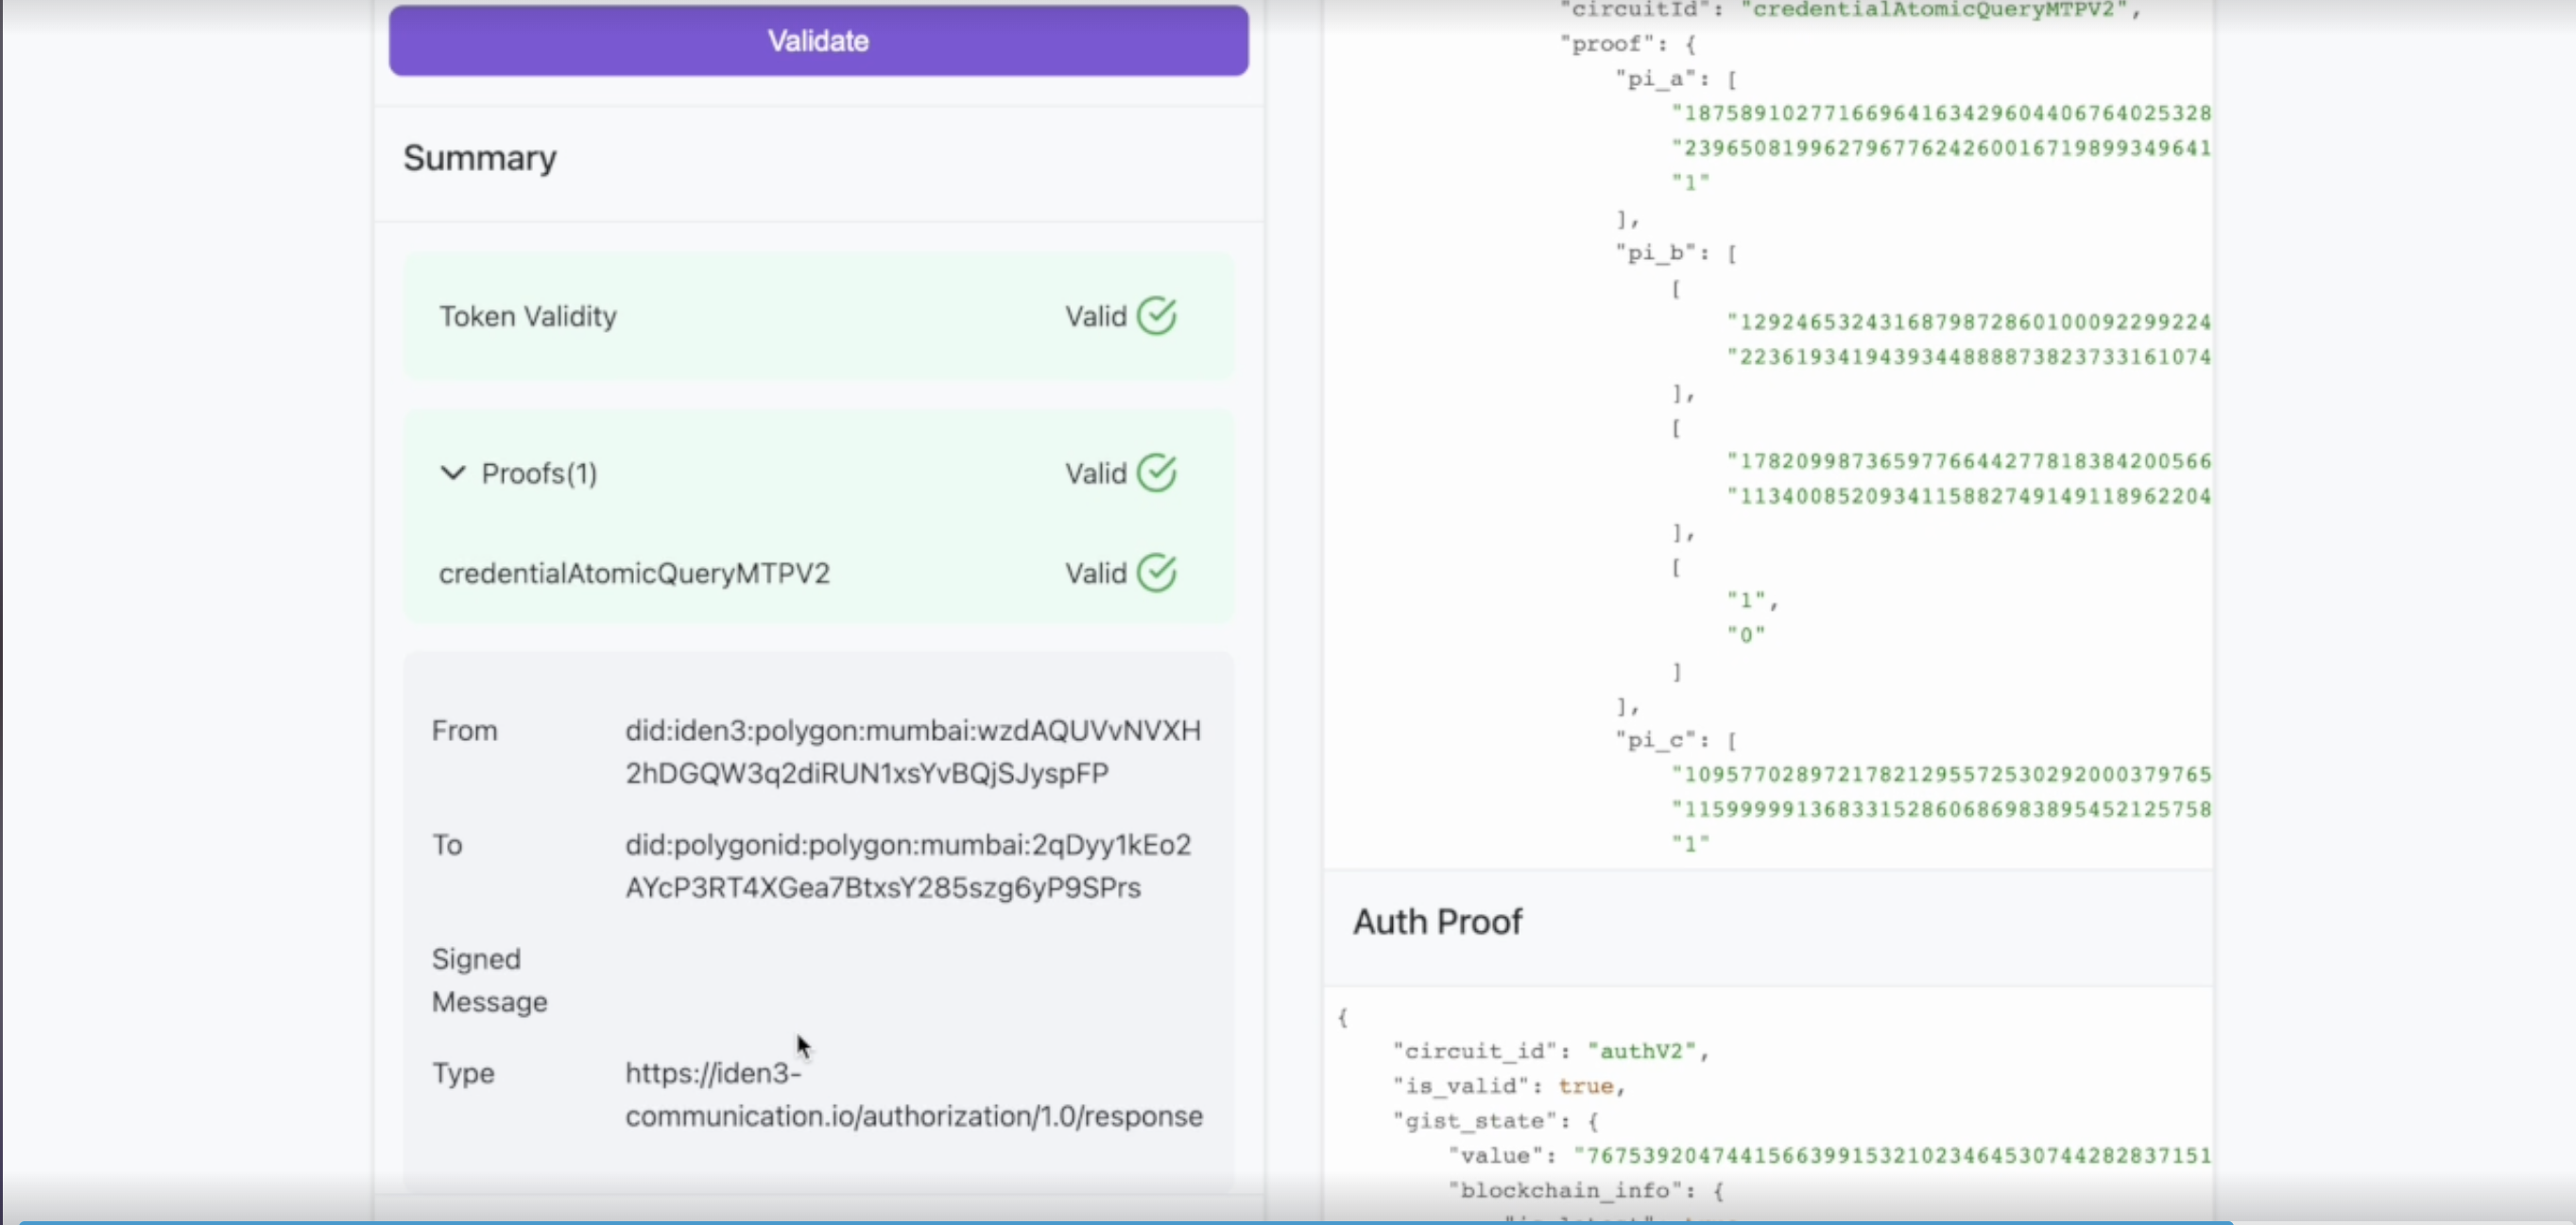
You can see proof (CredentialAtomicQueryMTPV2) along with the other data including from and to fields. The from field shows the DID that sent the proof request. It must match your wallet's DID. The to represents the Verifier DID to whom the proof request has been sent.
Wait for the proof to get published on-chain. After that, on the website, you can view the credential details that show state information such as txId (ID of the transaction done from a wallet to complete publishing of the state on-chain), blockTimestamp (time at which block was created), blockNumber, rootofRoots (Roots tree), claimsTreeRoot (Claims tree), revocationTreeRoot(Revocation tree):

Credential details:

Below the QR code, click the Polygon ID icon to open your browser wallet. On your wallet, click Receive to fetch and save the credential to your wallet.
