Proof Generation Overview
The proof generation starts with the Wallet scanning the QR code on the Verifier website/app. It is worth mentioning that the proof generation process initiates on the Verifier side first with the Verifier generating a Query Request.
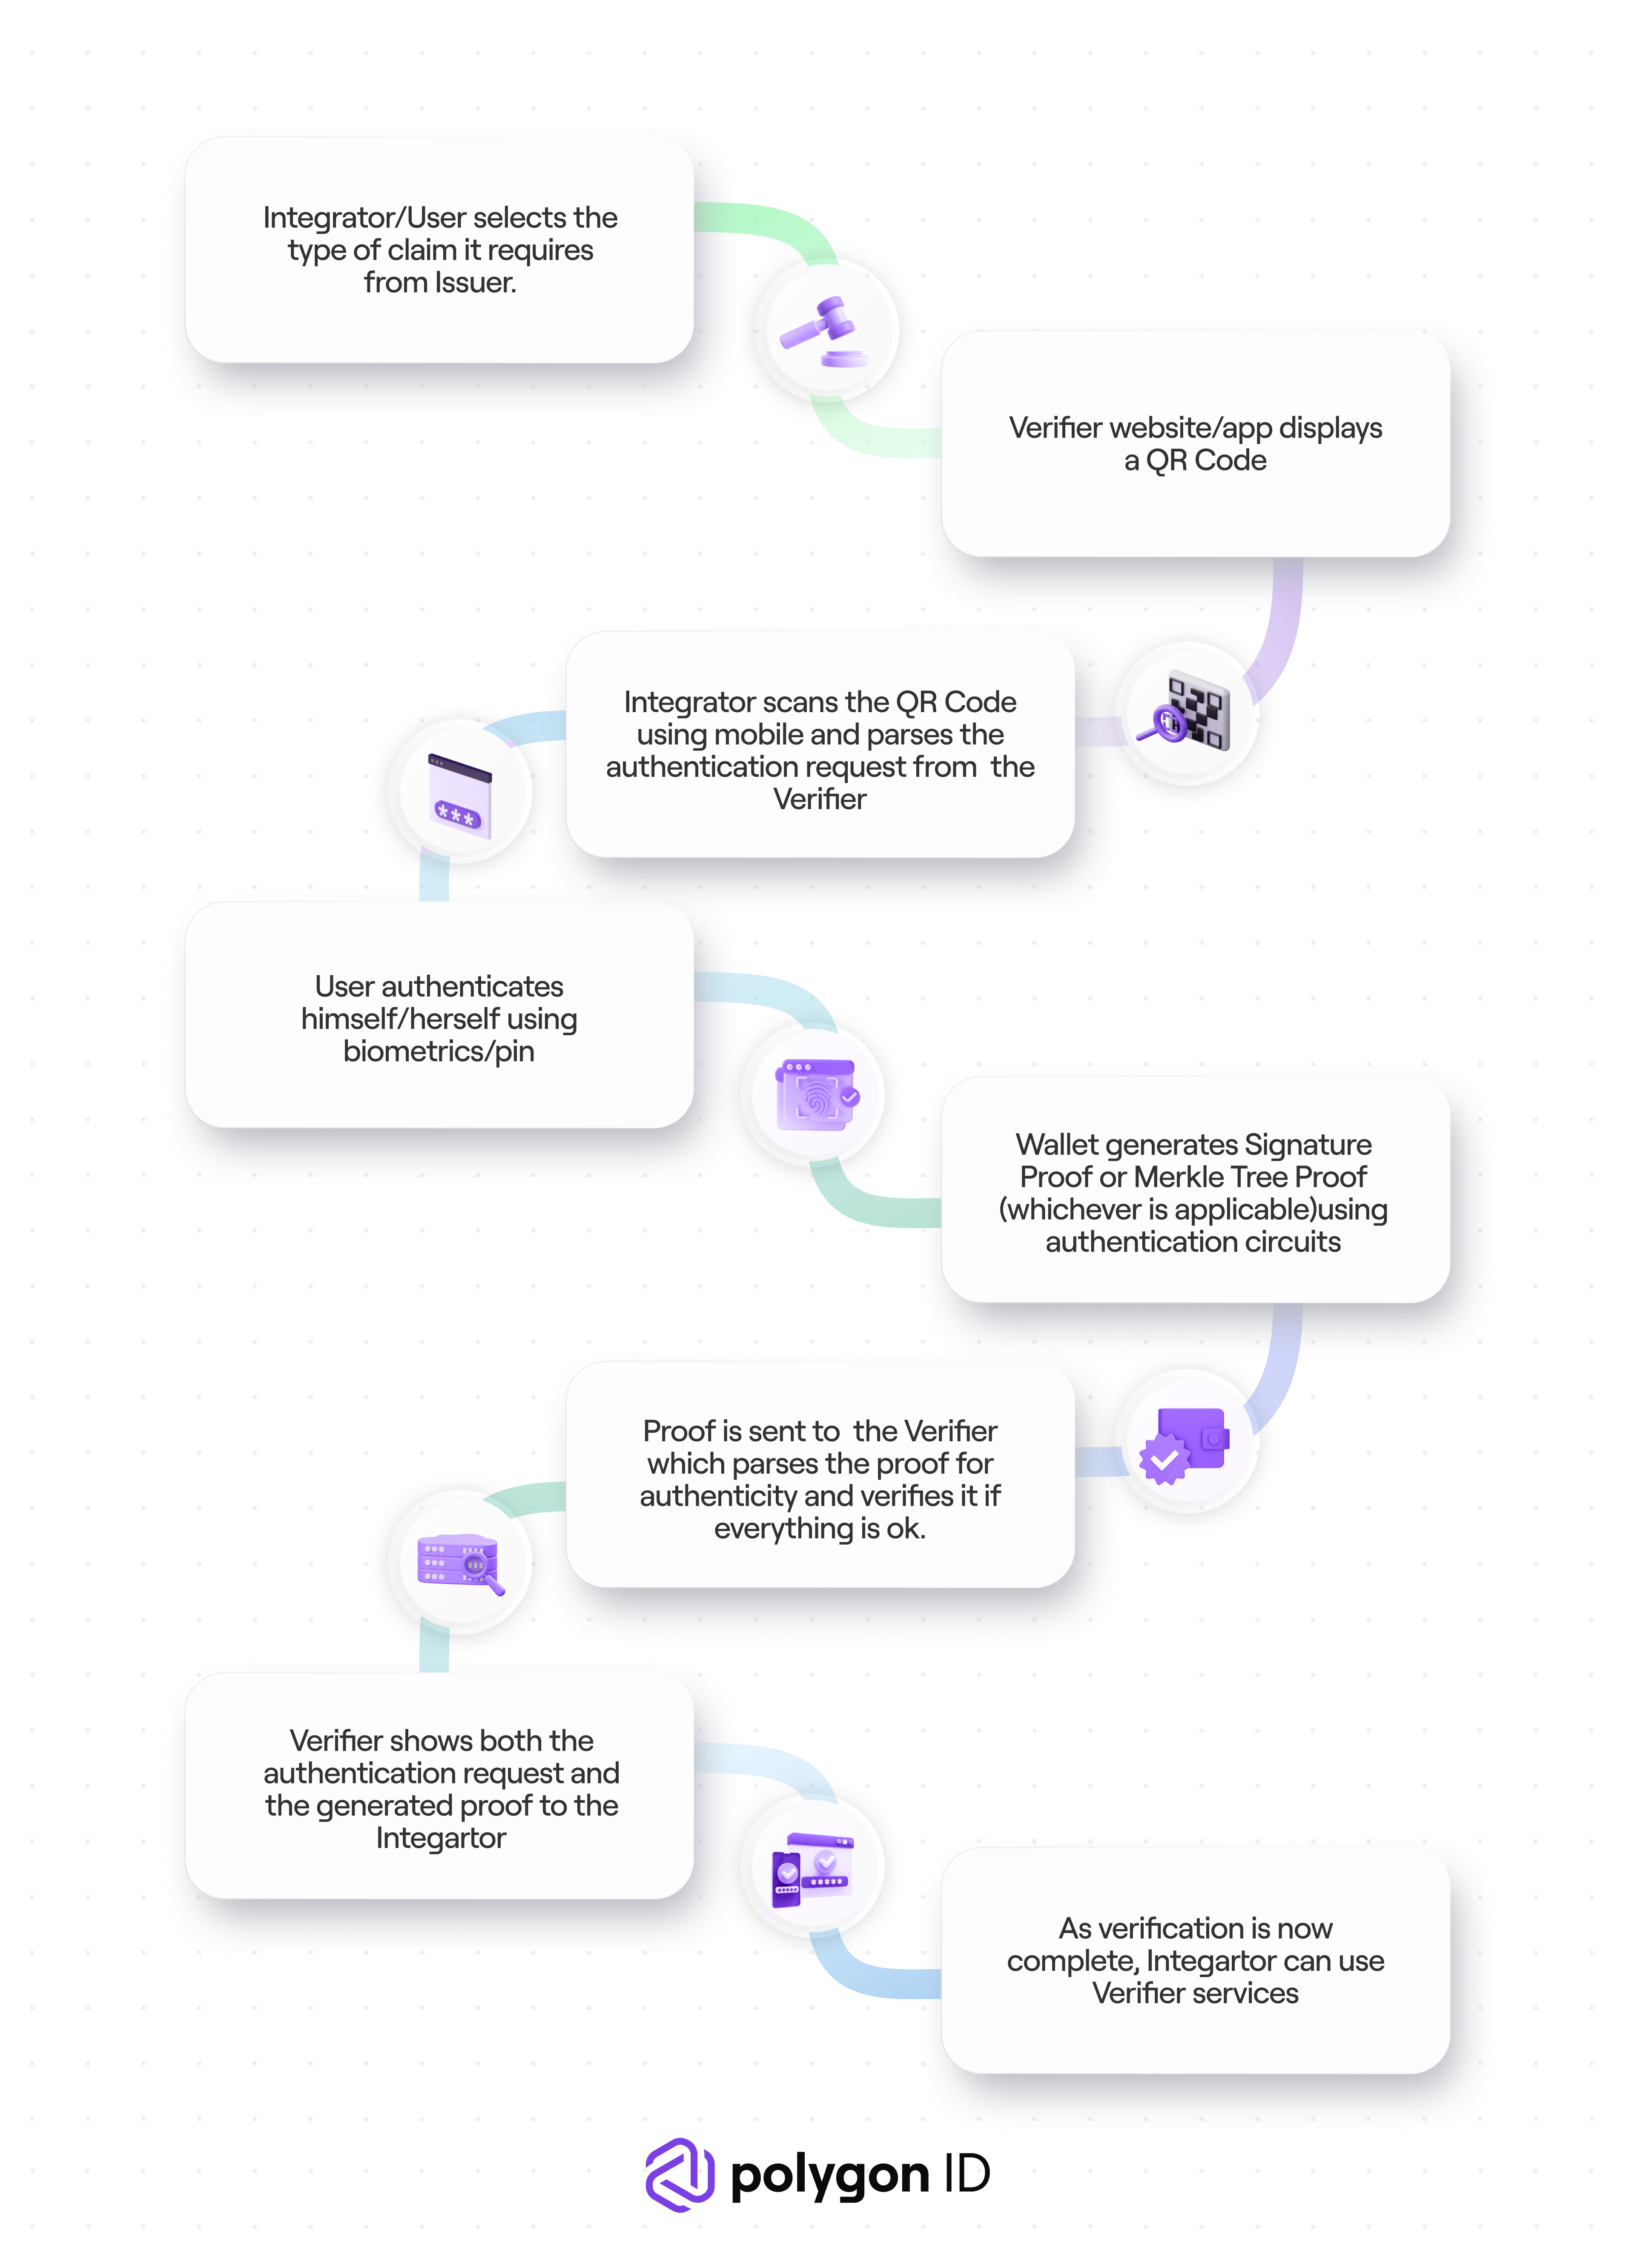
Steps of Proof Generation
Integrator selects the type of credential for which it seeks verification.
Verifier website/app displays the QR code depending on the credential type selected by the Integrator.
Integrator scans the QR code. By scanning, the Wallet parses the query-based authentication request shown by the Verifier. Read more about auth requests here.
Before the Wallet can generate a proof, it needs to authenticate itself first. Upon successful authentication (a pin or biometrics), the Wallet starts the process of generating either a signature-based proof or a Merkle-tree-based proof to be presented to the Verifier. The circuit sends back its response to the Verifier via
callbackUrl.After the proof is sent to the Verifier, it analyzes this proof for its authenticity and based on its analysis, verifies the proof.
The Verifier shows both the authorization request and the proof information to the Integrator.
As the verification is complete, an Integrator can now use the services of the Verifier. For example, if the Verifier is a DAO, the Integrator, upon successful verification, becomes a DAO member and can participate in the voting activities.
Read more about the circuits used for proof generation here.